

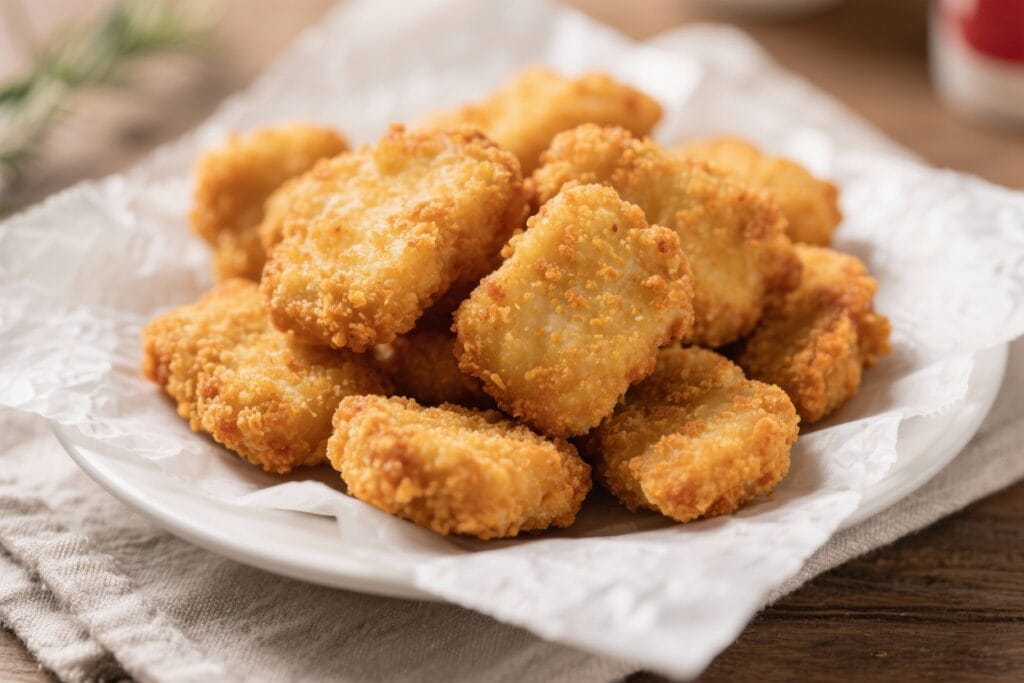
If you’re craving those famous crispy, juicy chicken nuggets but don’t want to leave the house, this recipe hits the spot. It’s simple, quick to prep, and uses ingredients you probably already have. The secret is in the seasoning and a quick brine that keeps the chicken tender.
You’ll get golden, crunchy nuggets with a soft, flavorful center every time. Make a batch for dinner, game day, or the kids—these are always a hit.
What Makes This Recipe So Good
- Perfectly tender inside, crispy outside: A quick milk brine keeps the chicken juicy while the coating fries up crunchy.
- Familiar flavor: A blend of powdered sugar and simple spices mimics that iconic fast-food taste without being fussy.
- Quick and easy: Minimal prep and fast cook time. Great for busy nights.
- Flexible: Works in a skillet, air fryer, or oven.
You can also use chicken thighs for extra juiciness.
- Kid-approved: Bite-size pieces that reheat well and pair with any dipping sauce.
What You’ll Need
- 1.5 pounds boneless, skinless chicken breasts (or thighs), cut into 1-inch nuggets
- 1 cup milk (or buttermilk)
- 1 large egg
- 1 tablespoon pickle juice (optional but great for tang)
- 1.5 cups all-purpose flour
- 2 tablespoons cornstarch (for extra crunch)
- 1.5 teaspoons kosher salt
- 1 teaspoon black pepper
- 1 teaspoon paprika
- 1 teaspoon garlic powder
- 1 teaspoon onion powder
- 1 tablespoon powdered sugar (balances the seasoning)
- Oil for frying (peanut oil for classic flavor, or canola/vegetable oil)
- Optional: Pinch of cayenne for a mild heat
Instructions
- Prep the chicken: Pat the chicken dry and cut into bite-size pieces. Aim for uniform size so they cook evenly.
- Make the brine: In a bowl, whisk the milk, egg, and pickle juice. Add the chicken, stir to coat, and let sit for 20–30 minutes in the fridge.
- Mix the coating: In a shallow bowl, combine flour, cornstarch, salt, pepper, paprika, garlic powder, onion powder, powdered sugar, and cayenne if using.
- Coat the nuggets: Lift chicken from the brine, letting excess drip off.
Toss in the flour mixture, pressing to help the coating stick. Set coated pieces on a wire rack for 5 minutes.
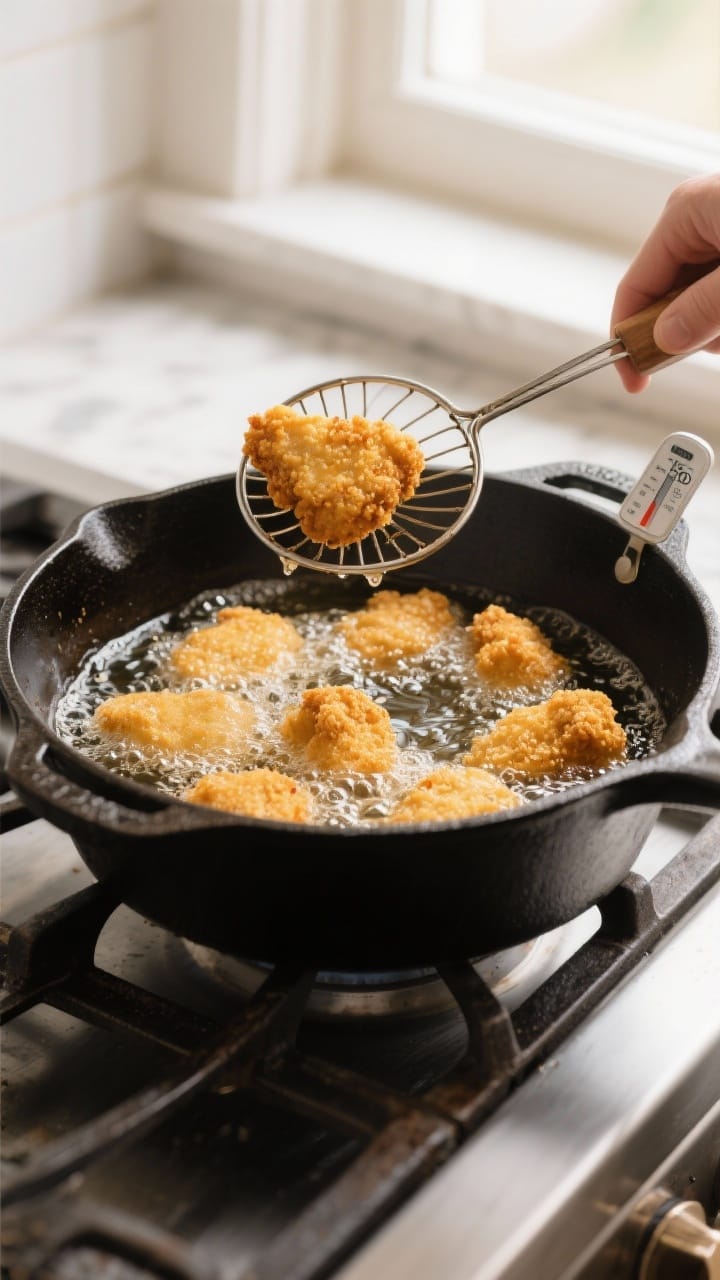
- Heat the oil: In a deep skillet or Dutch oven, heat 1–1.5 inches of oil to 350°F (175°C). Maintain temperature between 325–350°F.
- Fry in batches: Add nuggets without crowding.
Cook 3–4 minutes per side, about 6–7 minutes total, until golden and the internal temperature hits 165°F (74°C).
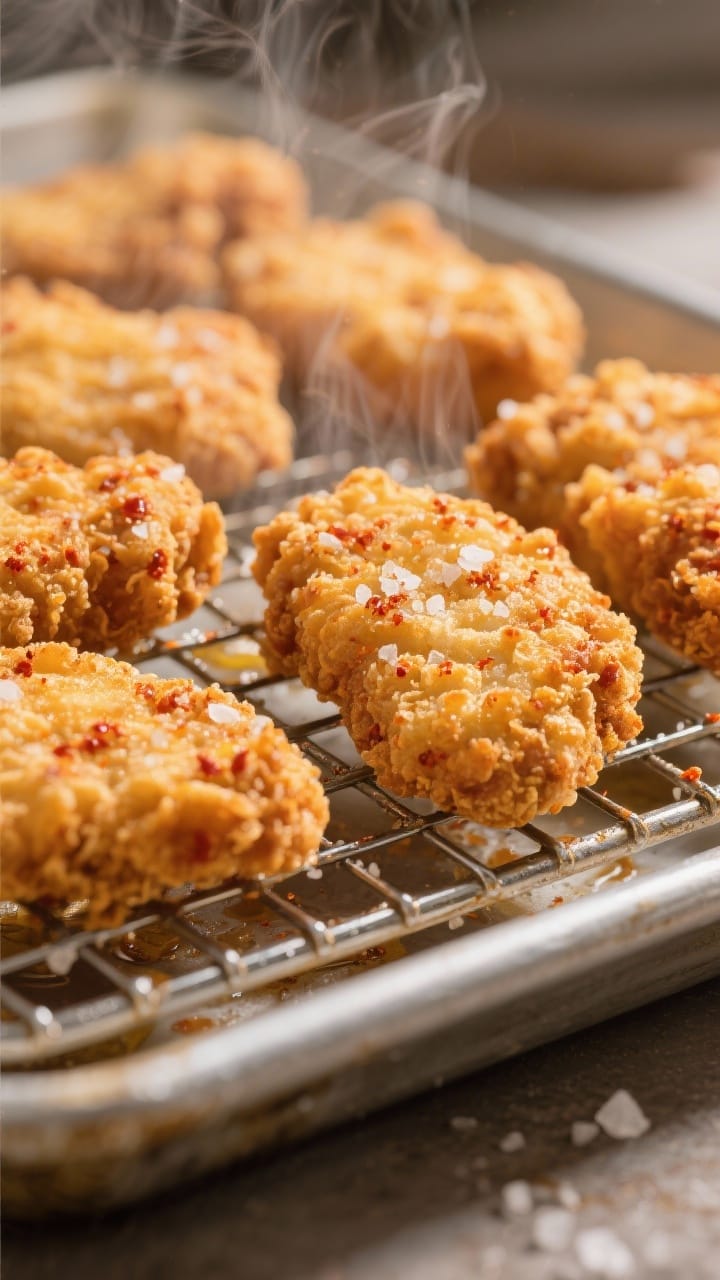
- Drain and rest: Transfer to a wire rack or paper towel–lined plate. Sprinkle with a tiny pinch of salt while hot.
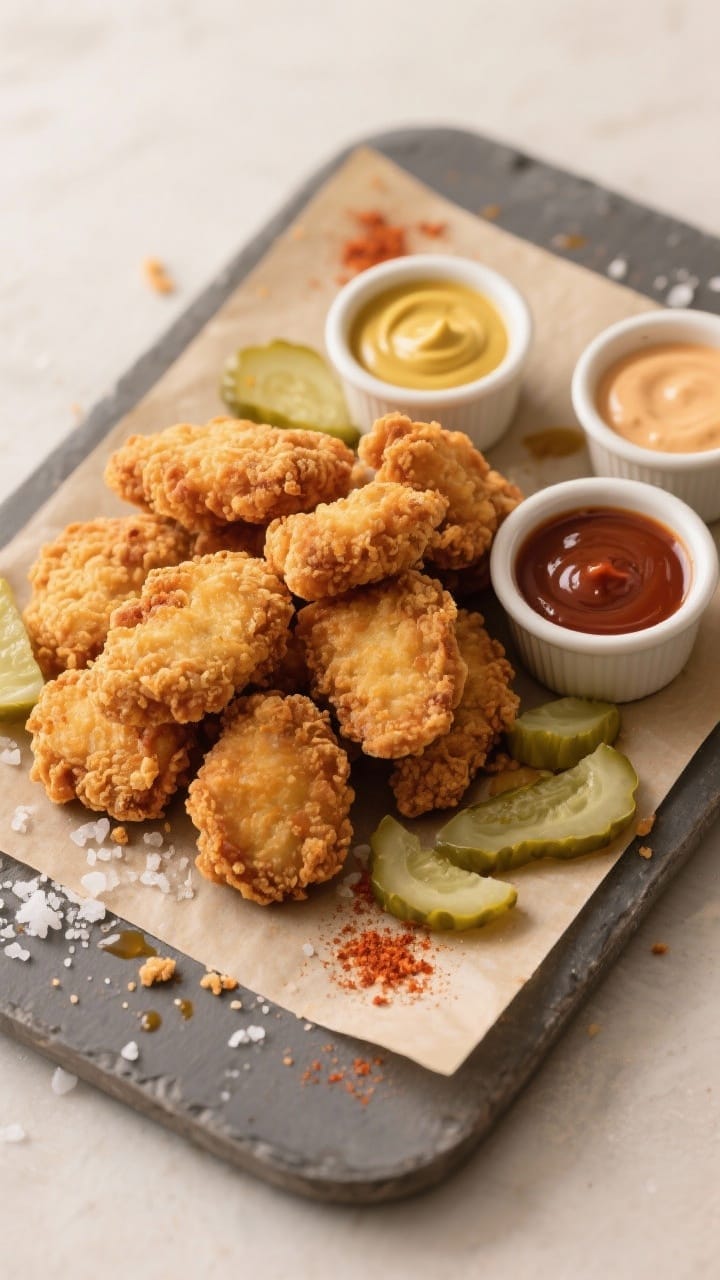
- Serve: Enjoy with your favorite sauces—honey mustard, barbecue, or a quick “house sauce” made from mayo, honey, mustard, and a dash of paprika.
Storage Instructions
- Fridge: Store cooled nuggets in an airtight container for up to 4 days.
- Freezer: Freeze in a single layer on a sheet pan until solid, then transfer to a freezer bag for up to 2 months.
- Reheat: Air fryer at 375°F for 4–6 minutes, oven at 400°F for 8–10 minutes, or toaster oven until hot and crisp. Avoid the microwave if you can—it softens the crust.
Health Benefits
- Lean protein: Chicken breast offers high-quality protein for muscle repair and steady energy.
- Control the oil: Home frying lets you choose fresh oil and avoid repeated high-heat restaurant oil cycles.
- Lower sodium: You control the salt level.
Skip extra salting or choose low-sodium sides to balance the meal.
- Baked or air-fried options: You can reduce added oil while keeping plenty of crunch with air frying.
Pitfalls to Watch Out For
- Skipping the rest after coating: Letting the flour stick for a few minutes prevents the crust from falling off.
- Oil too cool or too hot: Too cool equals greasy nuggets; too hot burns the crust. Use a thermometer.
- Crowding the pan: This drops the oil temperature and leads to soggy results. Fry in batches.
- Uneven sizes: Keep nugget pieces similar so they finish at the same time.
- Not seasoning after frying: A light pinch of salt right after frying brightens the flavor.
Alternatives
- Air fryer: Spray coated nuggets lightly with oil.
Cook at 380°F for 8–10 minutes, flipping halfway, until crisp and 165°F inside.
- Baked: Place on a wire rack set over a sheet pan, spray lightly with oil, and bake at 425°F for 15–18 minutes, flipping once.
- Gluten-free: Use a 1:1 gluten-free flour blend and cornstarch. Check all seasonings for gluten-free status.
- Dairy-free: Swap milk with unsweetened almond milk or oat milk and skip the powdered sugar if you prefer.
- Spicy version: Add 1/2–1 teaspoon cayenne or chipotle powder to the flour mix.
- Thigh meat: Juicier and forgiving. Cook times may be a minute longer per batch.
FAQ
Do I need pickle juice?
It’s optional, but it adds a light tang and helps tenderize the meat.
If you like that classic fast-food nuance, include it. If not, the nuggets are still excellent without it.
What oil should I use?
Peanut oil gives the most authentic flavor and high-heat performance. Canola or vegetable oil also work well and are more budget-friendly.
Can I make the nuggets ahead?
Yes.
Coat the nuggets and refrigerate them on a sheet pan for up to 8 hours before cooking. You can also fry, cool, and freeze for quick meals later.
How do I keep the crust from falling off?
Press the coating onto the chicken, rest the coated pieces for 5 minutes, and avoid fussing with them during the first minute of frying. Proper oil temperature helps, too.
Why add powdered sugar?
A small amount balances the savory spices and enhances browning.
It won’t make the nuggets taste sweet—just more rounded and craveable.
What’s the best dip to serve with these?
Honey mustard, barbecue, ranch, or a simple blend of mayo, honey, yellow mustard, and a pinch of paprika and garlic powder. Adjust sweetness to taste.
Wrapping Up
These Chick-Fil-A style chicken nuggets are fast, crunchy, and packed with flavor. With a short brine, a smart coating, and steady oil temperature, you’ll get reliable, restaurant-style results at home.
Keep a batch in the freezer, mix up your favorite dipping sauce, and you’re set for an easy crowd-pleaser any night of the week.