

Need a party dessert that looks cute, tastes like a throwback, and requires exactly zero oven time? These No-Bake Strawberry Banana Pudding Cups are that girl. Think creamy vanilla pudding, fresh fruit, and soft cookie layers stacked into grab-and-go cups that disappear fast.
They’re perfect for birthdays, brunches, baby showers, game nights, or any “I need something sweet but I’m busy” moment. Bonus: you can make them ahead, chill, and pull them out when guests show up like you planned everything days ago.
Why You’ll Love This
These pudding cups are quick to assemble, super customizable, and party-friendly (individual portions = no messy slicing). Plus, the strawberry-banana combo is classic, fresh, and feels a little fancy without extra work.
Ingredients
- 1 (5.1 oz) box instant vanilla pudding mix
- 3 cups cold milk (whole milk makes it extra creamy, but 2% works too)
- 1 cup whipped topping (like Cool Whip), thawed, or 1 cup homemade whipped cream
- 1 1/2 cups vanilla wafer cookies (about 45 wafers), plus extra for topping if you want
- 2 medium bananas, sliced (slice right before assembling for best color)
- 1 1/2 to 2 cups fresh strawberries, hulled and diced or thinly sliced
- 1 tablespoon powdered sugar (optional, for tossing with strawberries)
- 1 teaspoon lemon juice (optional, for tossing with banana slices to slow browning)
- 8 to 10 small clear cups or jars (6 to 8 oz each), for serving
How to Make It
- Make the pudding base: In a medium bowl, whisk the instant pudding mix with cold milk for 2 minutes until thickened. Let it sit for 3 to 5 minutes to fully set.
- Fold in the fluffy: Gently fold the whipped topping into the pudding until smooth and airy. This makes the texture light and mousse-y instead of heavy.
- Prep the fruit: Dice or slice strawberries. If they’re not super sweet, toss them with powdered sugar. Slice bananas right before layering; toss with lemon juice if you want to slow browning (optional).
- Crush the cookies: Lightly crush vanilla wafers in a zip-top bag (or pulse a few times in a food processor). You want a mix of crumbs and small pieces for the best texture.
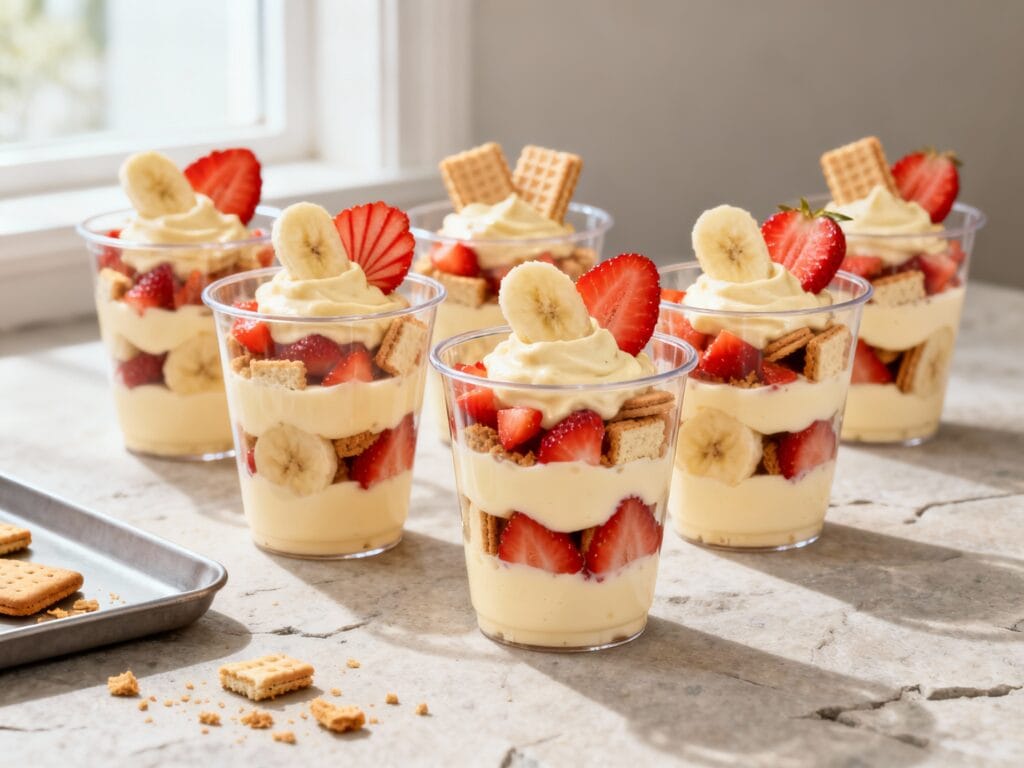
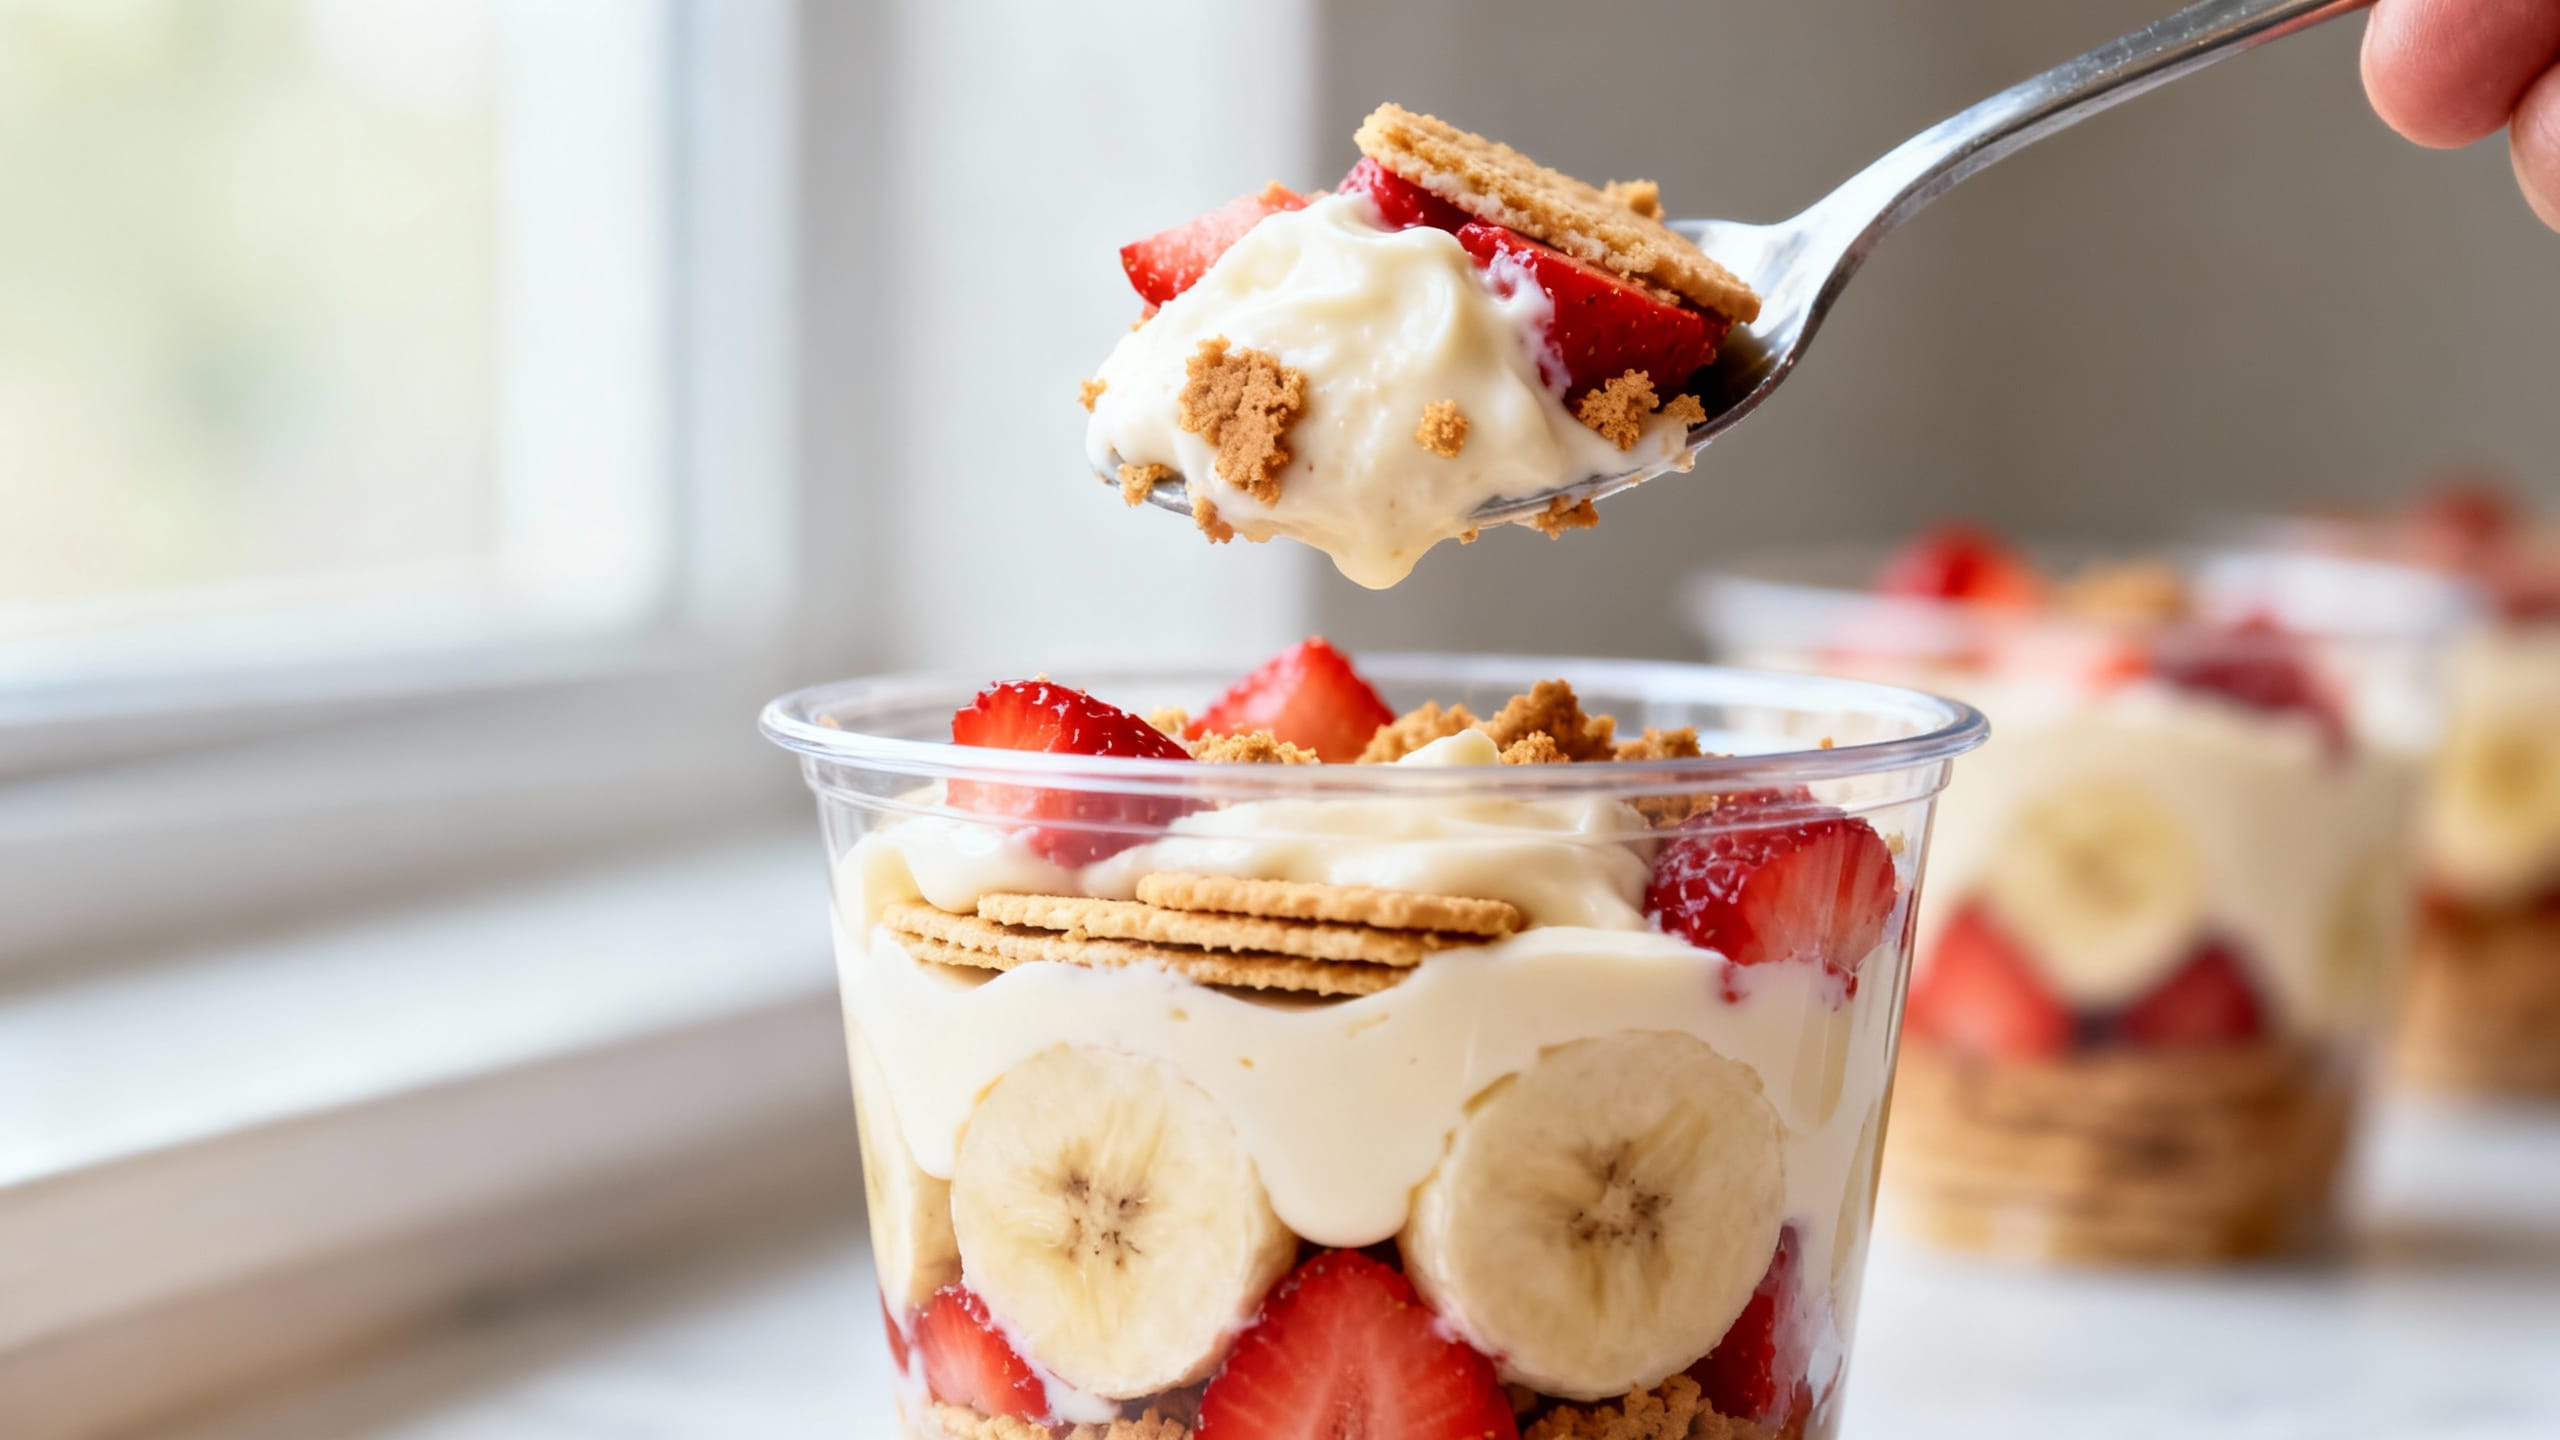
- Start layering: Add a spoonful of cookie crumbs to the bottom of each cup, then add a layer of pudding, then a layer of strawberries and bananas.
- Repeat: Add another layer of cookies, pudding, and fruit until the cups are full. Aim for 2 to 3 layers total depending on cup size.
- Finish it cute: Top with a final dollop of pudding/whipped topping, a few strawberry slices, and a cookie piece or crumb sprinkle.
- Chill: Refrigerate for at least 1 hour so the cookies soften slightly and everything settles into that classic pudding-cup vibe.
Tips for the Best Results
- Use cold milk: Instant pudding needs cold milk to set properly. If it’s lukewarm, it’ll stay runny.
- Slice bananas last: Bananas brown fast. If you’re prepping ahead, wait to slice them until you’re ready to assemble, or toss lightly with lemon juice.
- Don’t over-crush the cookies: A little texture is the whole point. Fine dust turns into mush too quickly.
- Let them chill: One hour is the sweet spot for soft-but-not-soggy layers. Overnight is even more “pudding dessert” style.
- Go for clear cups: The layers are half the fun, especially for parties. This is a “people eat with their eyes first” dessert.
- Keep fruit dry: Pat strawberries dry after washing. Extra water can make the layers slide and get watery.
Variations
- Strawberry cheesecake vibe: Use cheesecake-flavored instant pudding and swap vanilla wafers for graham cracker crumbs.
- Chocolate twist: Use chocolate pudding, keep the bananas, and add strawberries on top for a chocolate-dipped fruit moment.
- Berry mix: Replace some strawberries with raspberries or blueberries for a mixed-berry party cup.
- Healthier-ish swap: Use sugar-free pudding mix, light whipped topping, and add extra fruit. (Still dessert, just a little more balanced.)
- Extra crunch topping: Add chopped toasted almonds or granola on the top layer right before serving.
- Make it dairy-free: Use a dairy-free instant pudding (brand-dependent), plant milk that works with it (often soy), and coconut whipped topping.
Storage & Reheating
Store pudding cups covered in the refrigerator for up to 2 days. They’re best within 24 hours for the freshest fruit and the prettiest layers. No reheating needed (and please don’t)—serve chilled straight from the fridge.
FAQ
Can I make No-Bake Strawberry Banana Pudding Cups the night before a party?
Yes. They actually get better after a few hours because the cookies soften slightly. For the freshest look, consider adding the top fruit garnish right before serving, especially the banana slices.
How do I keep the bananas from turning brown in the cups?
Slice bananas right before assembling, and lightly toss them with a small amount of lemon juice (about 1 teaspoon). Also, make sure banana slices are tucked between pudding layers, which reduces air exposure.
What size cups should I use for party servings?
For parties, 6 to 8 oz clear cups are perfect: big enough to feel like a real dessert, small enough that people can grab one and keep mingling. For a dessert table with lots of options, 4 oz cups are cute and portion-friendly.
Can I use homemade pudding instead of instant pudding mix?
You can, as long as it’s fully cooled and thick. Homemade pudding tends to be softer when warm, so chill it first. Once cooled, fold in whipped topping or whipped cream for that classic fluffy texture.
My pudding cups got watery—what happened?
Usually it’s extra moisture from the fruit or under-set pudding. Make sure strawberries are patted dry after washing, use cold milk so the pudding sets properly, and don’t assemble too far in advance if your fruit is extra juicy.