

If you love chicken pot pie but don’t love making it a whole weekend project, this one’s for you. This easy chicken pot pie recipe is the weeknight version: creamy, cozy filling and a crisp, golden top without the fuss.
We’re keeping it practical with rotisserie (or leftover) chicken, frozen veggies, and a quick stovetop sauce. Then it’s straight into the oven for that flaky, can’t-wait-to-dig-in finish.
Why You’ll Love This
It hits all the comfort-food notes—rich, creamy filling, tender chicken, and a crisp pastry top—while staying totally doable on a busy night, thanks to shortcuts that don’t taste like shortcuts.
Ingredients
- 2 cups cooked chicken, shredded or diced (rotisserie works great)
- 1/4 cup unsalted butter
- 1 small yellow onion, finely diced
- 2 garlic cloves, minced
- 1/3 cup all-purpose flour
- 1 3/4 cups chicken broth
- 3/4 cup milk (whole milk preferred, but 2% works)
- 1/2 cup heavy cream (optional but makes it extra creamy)
- 1 1/2 cups frozen mixed vegetables (peas/carrots/corn/green beans)
- 1/2 cup diced potatoes (small dice so they cook fast) or 1 cup frozen diced hash browns
- 1 tsp kosher salt (plus more to taste)
- 1/2 tsp black pepper
- 1/2 tsp dried thyme
- 1/4 tsp dried rosemary (optional)
- 1 tbsp chopped parsley (optional)
- 1 sheet puff pastry, thawed (or 1 refrigerated pie crust)
- 1 egg, beaten (egg wash for a glossy, crisp top)
How to Make It
- Preheat your oven to 400°F. Lightly grease a 9-inch pie dish or a similar-size baking dish.
- In a large skillet or Dutch oven, melt the butter over medium heat. Add the onion and cook 3–4 minutes until softened. Stir in the garlic for 30 seconds.
- Sprinkle the flour over the onion mixture and stir constantly for 1 minute to cook out the raw flour taste. You’re building the base for that creamy filling.
- Slowly whisk in the chicken broth, then whisk in the milk (and heavy cream, if using). Keep whisking until smooth, then simmer 3–5 minutes until thickened to a gravy-like consistency.
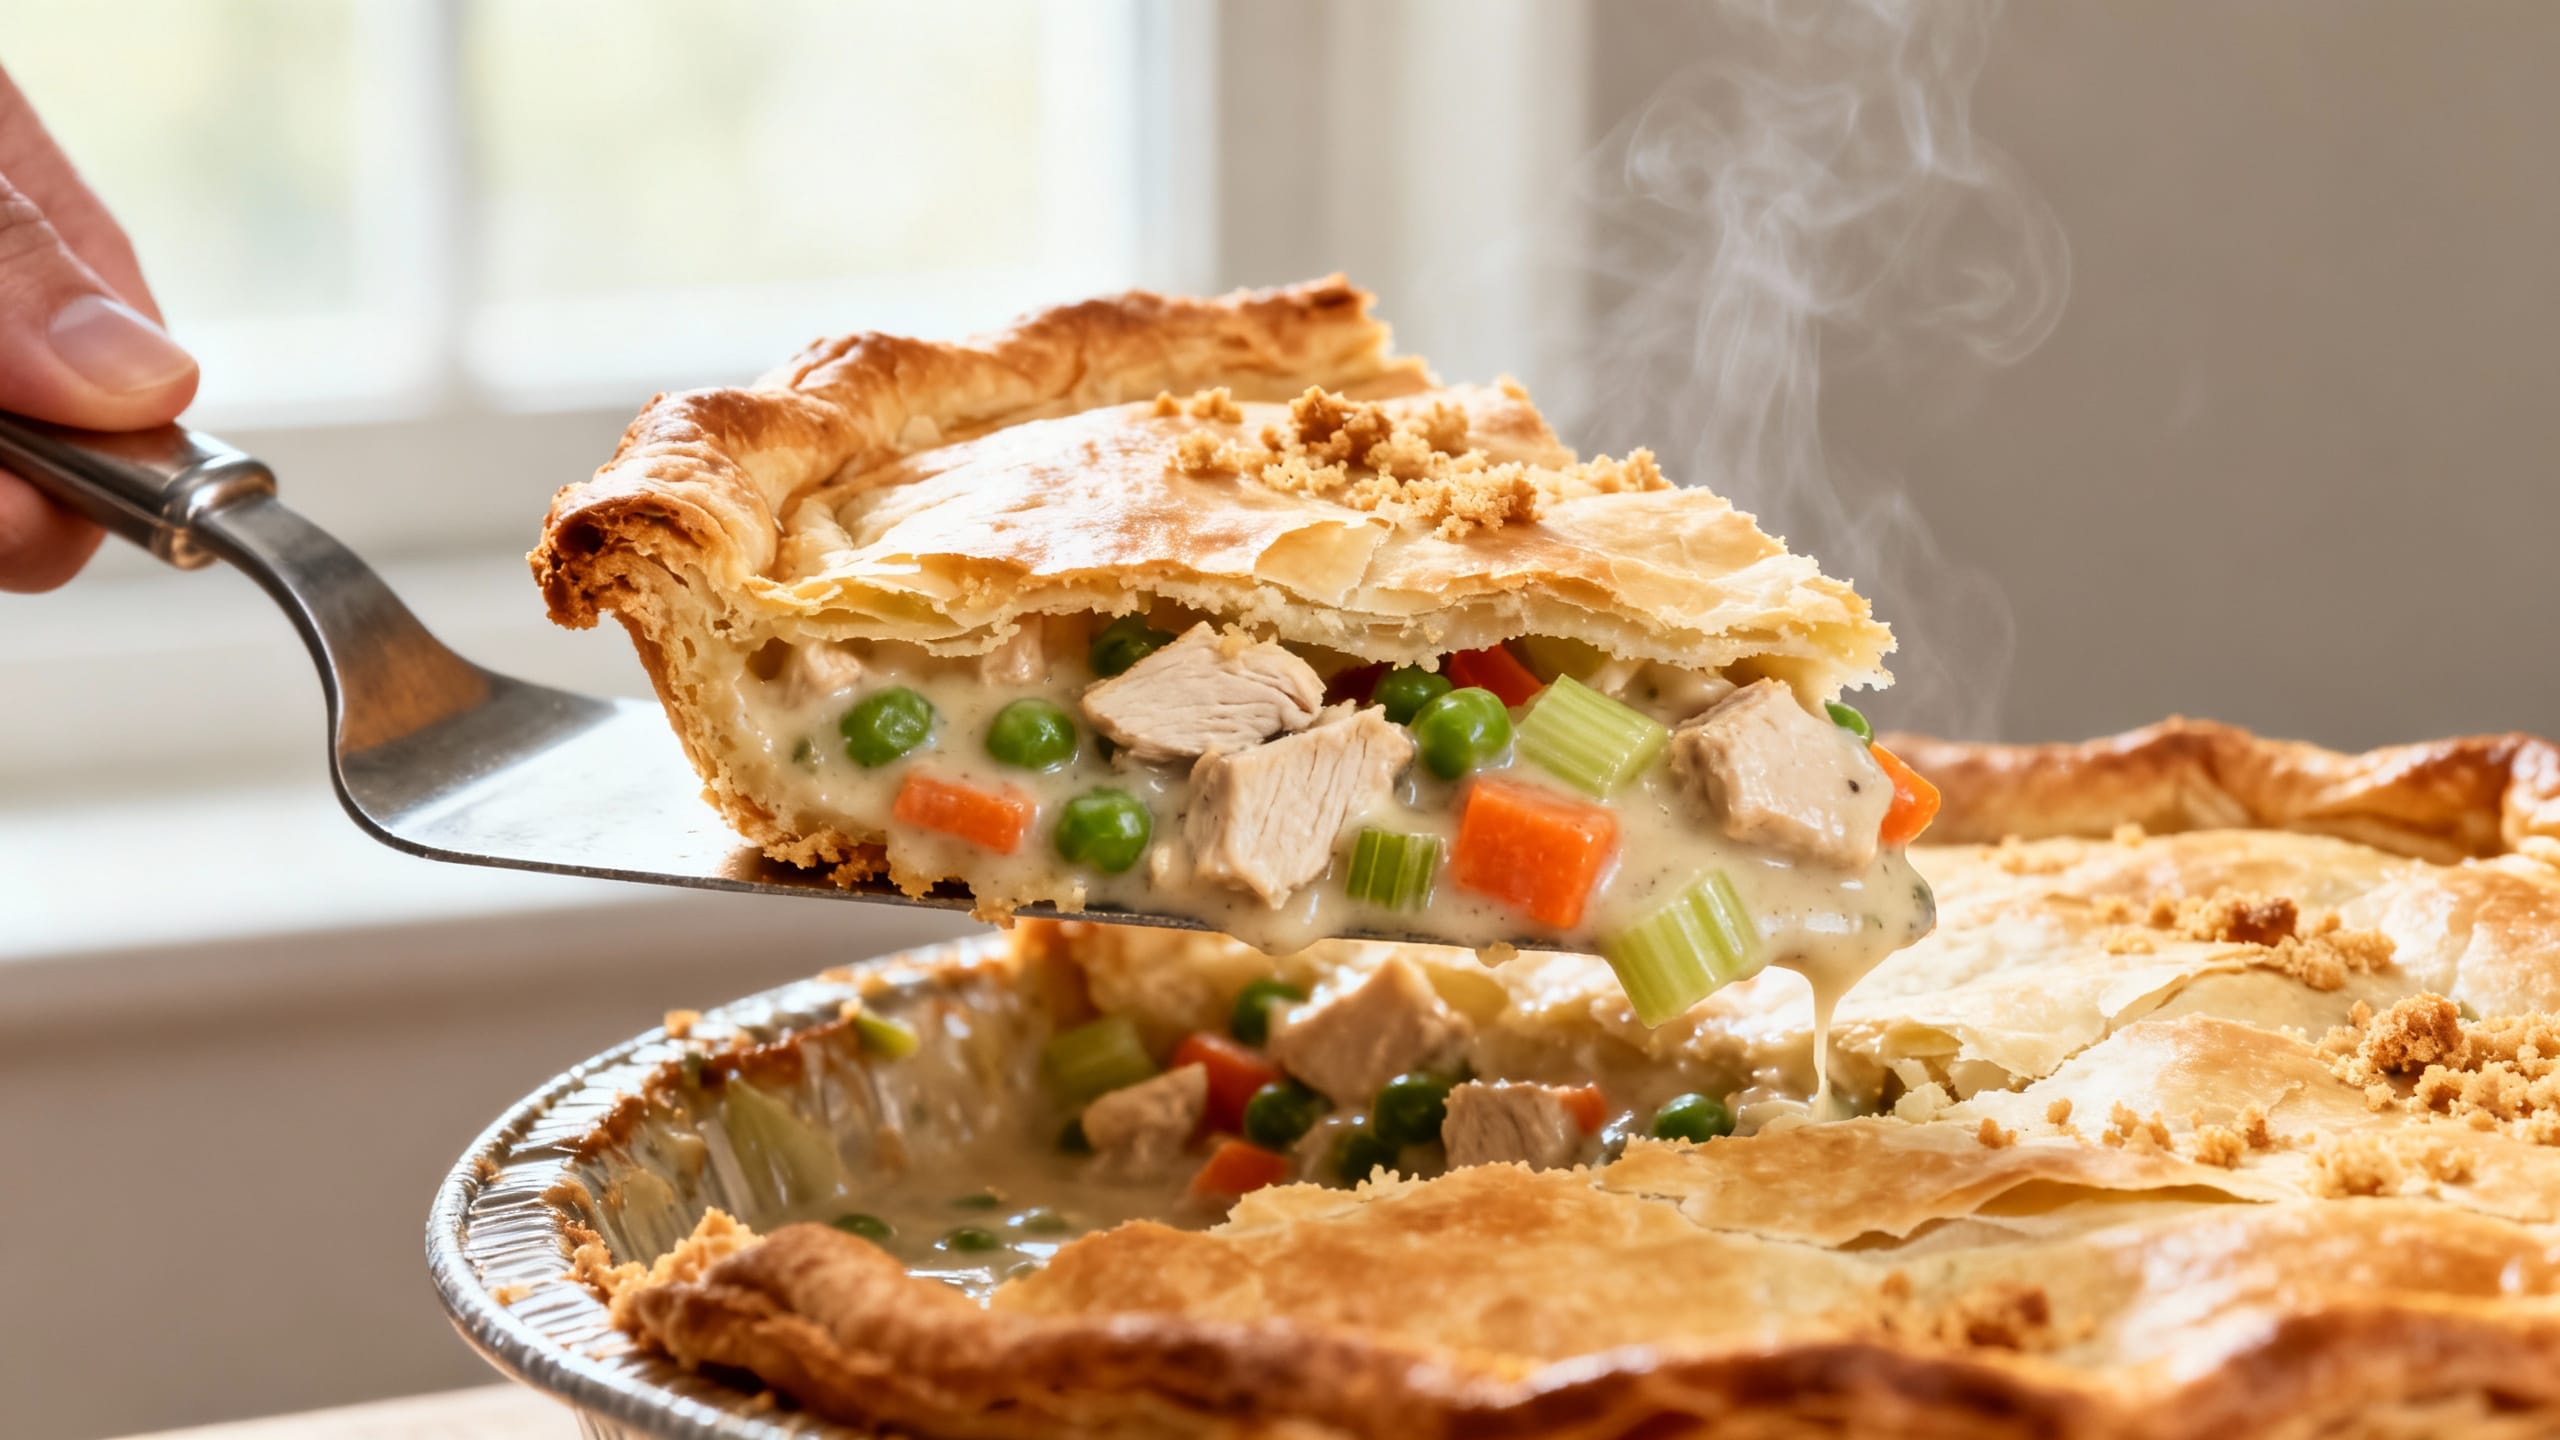
- Stir in the frozen mixed vegetables, diced potatoes (or frozen diced hash browns), salt, pepper, thyme, and rosemary. Simmer 5–8 minutes, stirring often, until the veggies are hot and the potatoes start to soften. The filling should be thick, not soupy.
- Turn off the heat and fold in the cooked chicken and parsley. Taste and adjust salt and pepper. Pour the filling into your prepared baking dish.
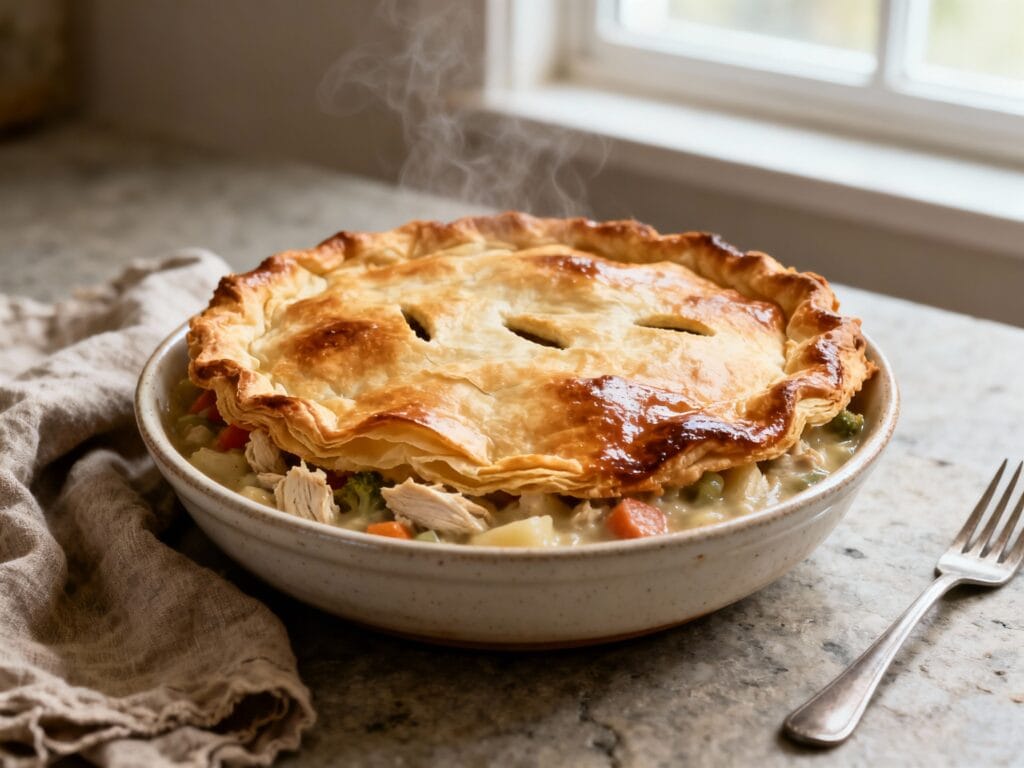
- Top with puff pastry (or pie crust). If using puff pastry, lay it over the dish and trim the edges. Crimp or press to the rim. Cut 4–6 small slits in the top for steam to escape.
- Brush the pastry with the beaten egg. Bake 20–25 minutes, or until the top is deeply golden and crisp and the filling is bubbling at the edges. If the top browns too quickly, tent loosely with foil.
- Let it rest 10 minutes before slicing. This helps the filling set so it serves up creamy, not runny.
Tips for the Best Results
- Keep the filling thick: If it looks thin in the pan, simmer a couple more minutes before baking. A thicker filling = a cleaner slice.
- Small potato dice matters: Big chunks won’t soften fast enough. If you want zero guesswork, use frozen diced hash browns.
- Use cold pastry: Puff pastry bakes flakier when it goes into the oven chilled. If it gets warm while you prep, pop it in the fridge for 10 minutes.
- Vent the top: Those little slits stop steam from turning your crisp top into a soggy situation.
- Place the dish on a sheet pan: It catches any bubbly overflow and makes oven-to-table transport easier.
- Want extra color? Add a pinch of paprika to the filling, or sprinkle flaky salt on the egg-washed top.
Variations
- Extra cozy: Stir in 1/4 cup grated Parmesan or a spoonful of cream cheese for a richer, slightly tangy filling.
- Turkey swap: Use leftover turkey and turkey stock—perfect for post-holiday dinners that don’t feel like leftovers.
- Biscuits instead of pastry: Bake the filling in a casserole dish and top with refrigerated biscuit dough; add a few extra minutes until baked through.
- More veggies: Add sliced mushrooms (sauté with the onion) or stir in a handful of baby spinach at the end.
- Gluten-free: Use a 1:1 gluten-free flour blend for the roux and a gluten-free pie crust on top.
- Mini pot pies: Divide filling into ramekins and top each with pastry. Start checking around 15–18 minutes.
Storage & Reheating
Store leftovers covered in the fridge for up to 4 days. Reheat in a 350°F oven until hot (about 15–25 minutes, depending on portion size) to bring back the crisp top; the microwave works for speed, but the crust will soften—if you do microwave, finish with a few minutes in the oven or air fryer for texture.
FAQ
Can I make this chicken pot pie ahead of time for a weeknight?
Yes. Make the filling up to 2 days ahead and refrigerate. When ready to bake, warm the filling on the stove just until loosened (so it’s not ice-cold), add it to the dish, top with pastry, and bake as directed.
How do I keep the bottom from getting soggy if there’s only a top crust?
Two things help: thicken the filling well on the stove (it should coat a spoon), and let the pie rest 10 minutes after baking so it sets. Also, bake on a lower-middle rack so the dish gets good heat.
Can I use pie crust instead of puff pastry?
Absolutely. A refrigerated pie crust works great here. You’ll still want to vent the top and brush with egg wash for color. Bake time is similar, but start checking at 18–20 minutes and go until golden.
My filling came out too thick—how do I fix it?
Easy fix: stir in a splash of chicken broth or milk a little at a time until it’s creamy again. If it thickened after chilling, warm it gently on the stove and loosen as needed before baking.
Can I freeze this weeknight chicken pot pie?
For best texture, freeze the filling (up to 3 months), then thaw overnight in the fridge and bake fresh with a new pastry top. You can freeze it fully assembled, but puff pastry can bake less crisp after freezing—still tasty, just not quite as flaky.