

Cream puffs feel fancy, but they’re secretly one of the most beginner-friendly “wow” desserts you can bake. If you’ve never made choux pastry before, don’t stress—this dough is cooked on the stove first, then baked into light, crisp shells that puff up like magic.
This cream puffs recipe walks you through a simple choux pastry plus a sweet vanilla filling. You’ll get bakery vibes at home, without needing special tools or advanced skills.
Why You’ll Love This
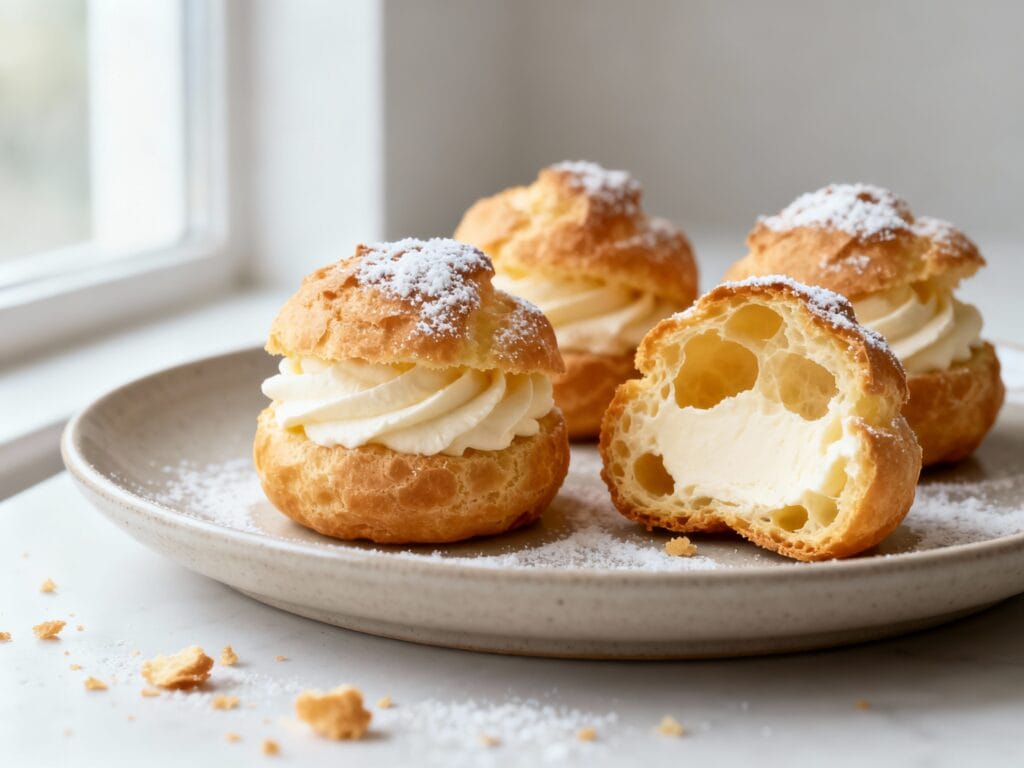
These cream puffs are light, airy, and crisp on the outside with a sweet, creamy filling inside—aka the perfect bite. The steps are straightforward, the ingredients are basic, and once you learn choux, you’ll want to use it for everything.
Ingredients
- For the choux pastry: 1/2 cup (120 ml) water
- 1/2 cup (120 ml) whole milk
- 1/2 cup (113 g) unsalted butter, cut into pieces
- 1 tablespoon granulated sugar
- 1/2 teaspoon fine salt
- 1 cup (125 g) all-purpose flour
- 4 large eggs, room temperature
- For the sweet filling: 1 1/2 cups (360 ml) cold heavy cream
- 1/3 cup (40 g) powdered sugar, plus more to dust
- 1 teaspoon vanilla extract
- Optional: 2 tablespoons instant vanilla pudding mix (for extra stability)
How to Make It
- Prep the oven and pans. Heat oven to 425°F (220°C). Line two baking sheets with parchment paper. (If you have it, a silicone mat works too.)
- Boil the base. In a medium saucepan over medium heat, combine water, milk, butter, sugar, and salt. Stir and bring to a full simmer so the butter is completely melted.
- Add flour and cook the dough. Reduce heat to low and add the flour all at once. Stir vigorously with a wooden spoon or sturdy spatula until a smooth dough forms and pulls away from the sides. Keep cooking and stirring for about 1–2 minutes; a thin film on the bottom of the pan is normal.
- Cool slightly, then add eggs. Transfer dough to a mixing bowl and let it cool for 3–5 minutes (you want it warm, not hot). Add eggs one at a time, mixing well after each. At first it’ll look separated—keep mixing. The final dough should be smooth, glossy, and fall from the spoon in a thick “V” shape.
- Pipe or scoop. Transfer dough to a piping bag with a large round tip, or use a spoon/cookie scoop. Pipe 1 1/2-inch mounds, spaced a couple inches apart. Smooth any pointy tops with a damp fingertip.
- Bake to puff. Bake at 425°F (220°C) for 10 minutes, then (without opening the oven) reduce to 375°F (190°C) and bake 15–20 minutes more, until deeply golden and firm.
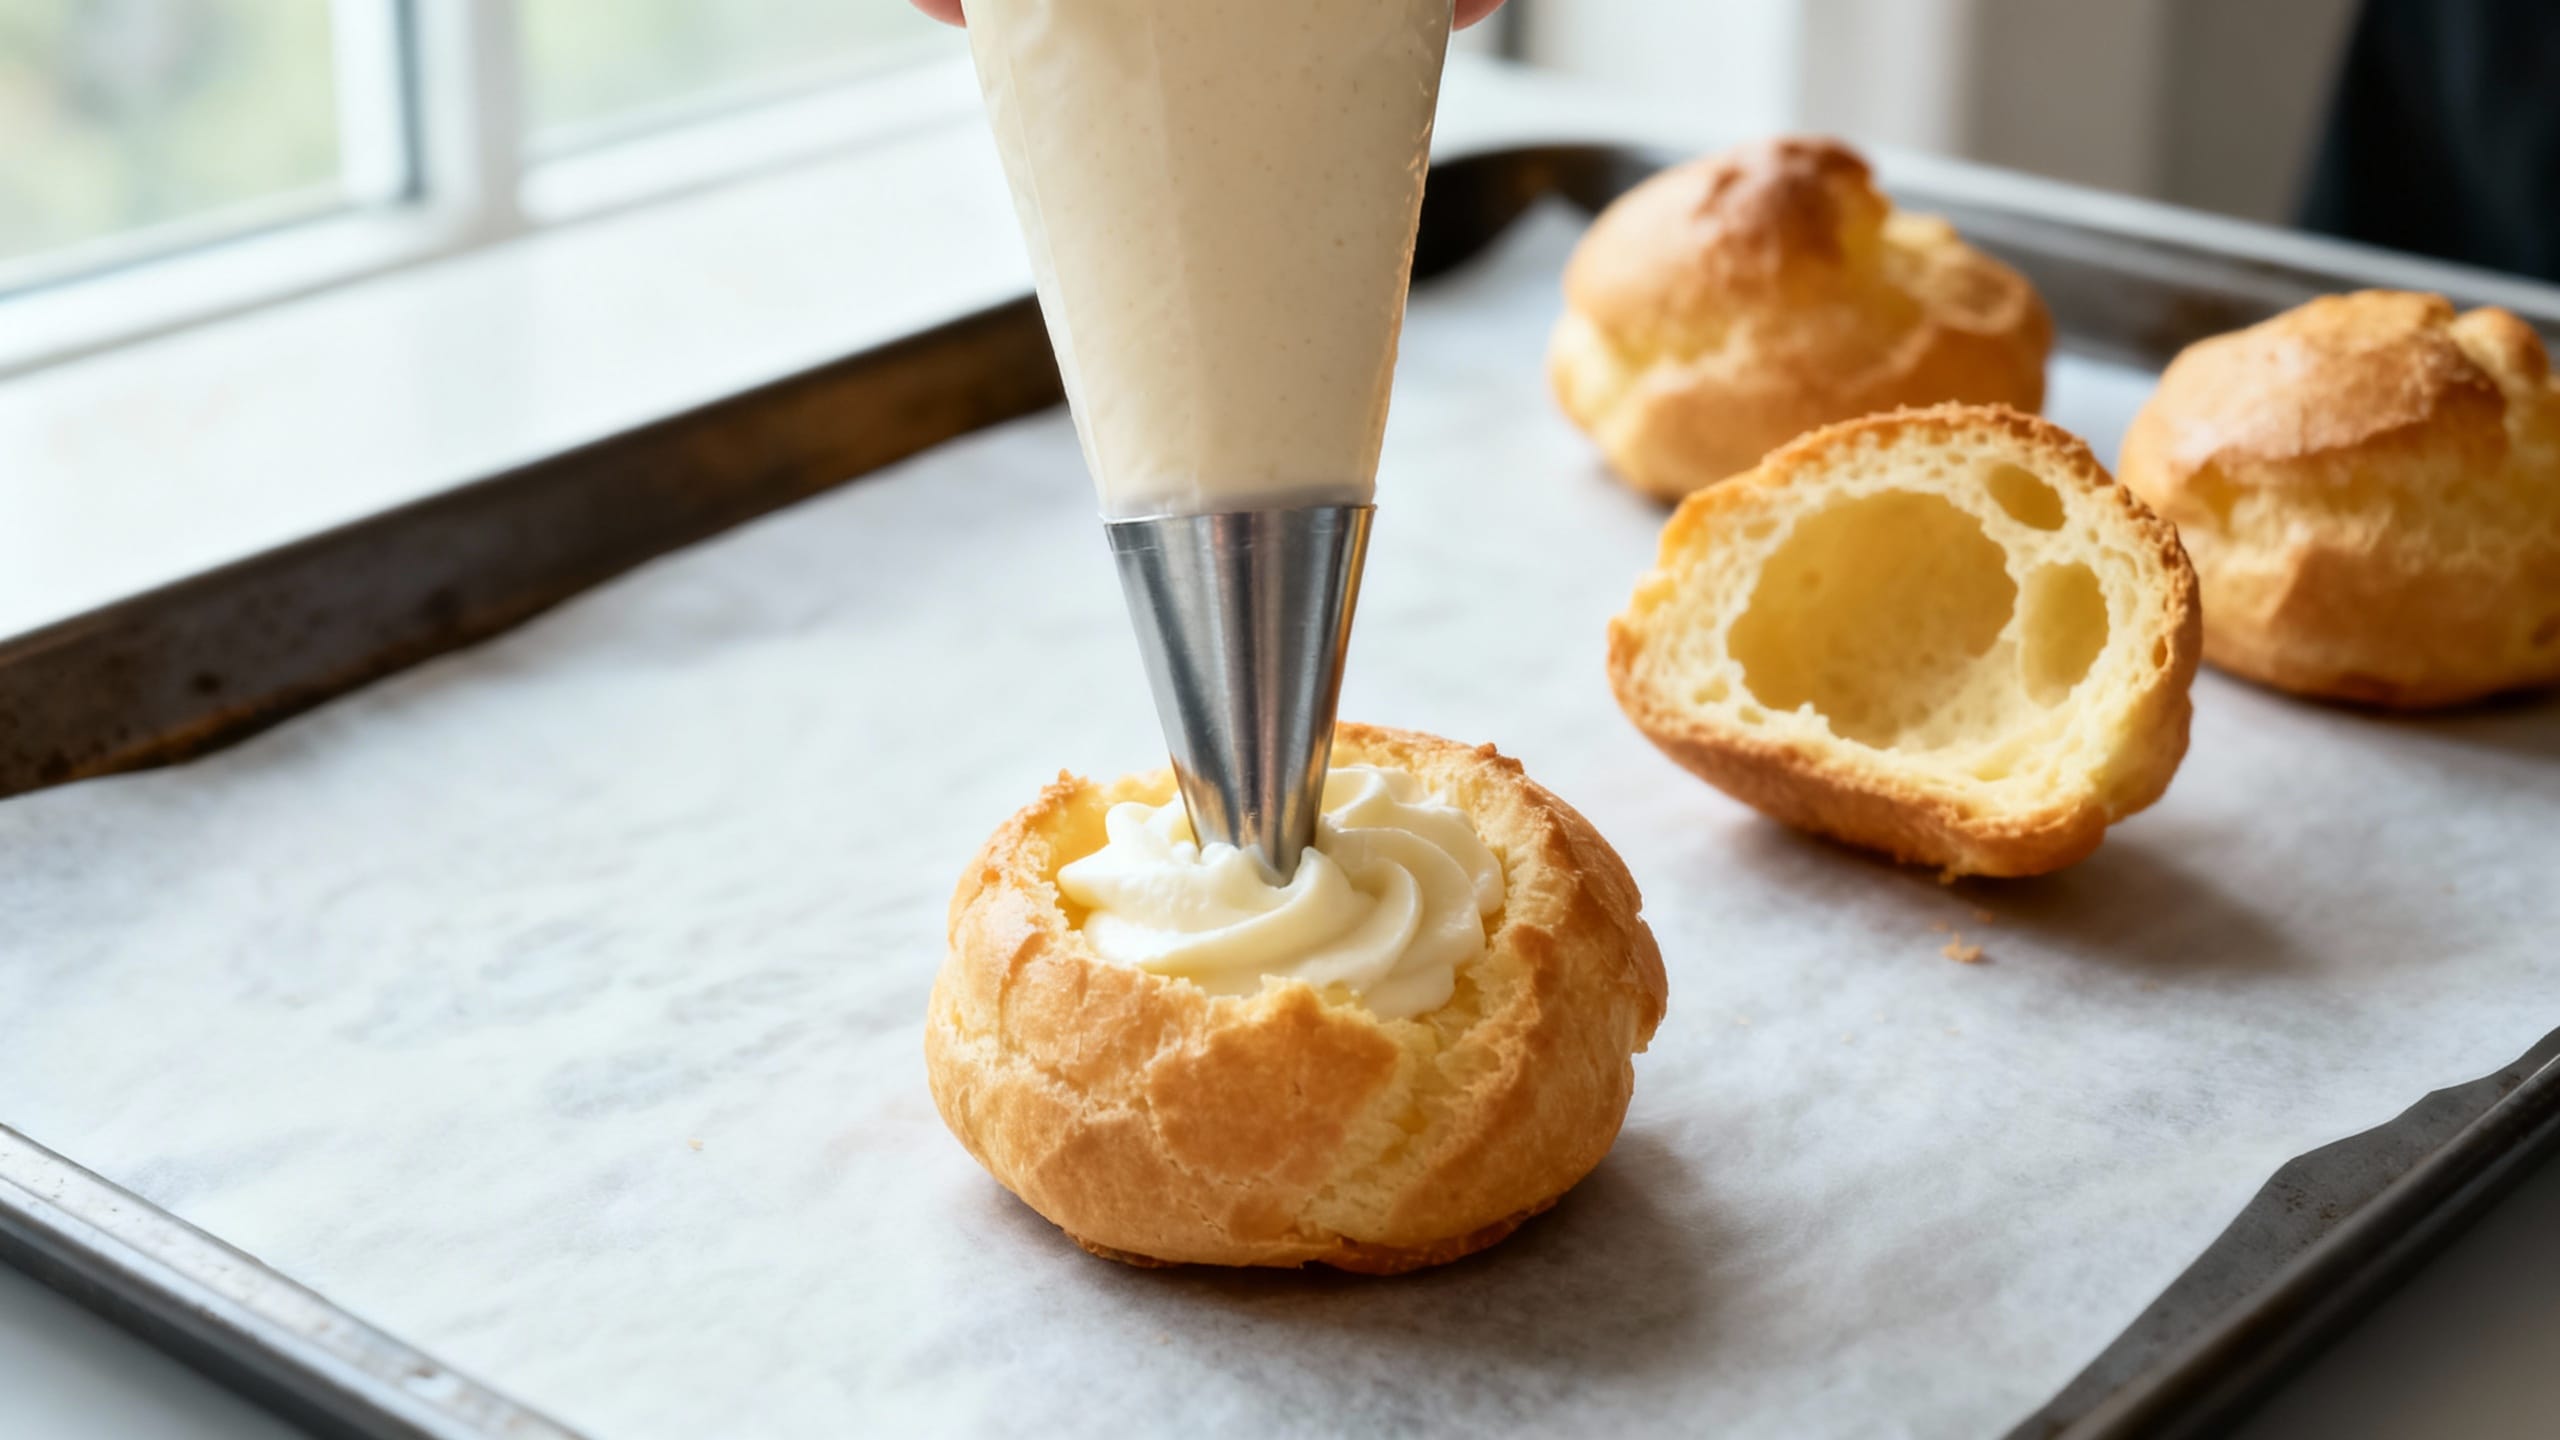
- Dry the shells. Turn off the oven, crack the door open slightly, and let the puffs sit inside for 10 minutes to dry out (this helps prevent collapse). Remove and cool completely.
- Make the filling. Whip cold heavy cream with powdered sugar and vanilla to medium-stiff peaks. If using pudding mix, add it with the powdered sugar for a more stable, bakery-style filling.
- Fill and finish. Slice puffs in half or poke a hole in the bottom. Pipe or spoon in the cream. Dust with powdered sugar right before serving.
Tips for the Best Results
- Measure flour correctly. Spoon into the measuring cup and level off. Too much flour can make dense puffs.
- Cook the flour step. That 1–2 minutes of stirring on the stove helps the dough dry out so it can puff properly.
- Room-temp eggs = smoother dough. Cold eggs can make the dough harder to emulsify.
- Watch the dough texture. The “V” shape test matters more than the exact egg count. If your eggs are extra large, you may not need all of the last one.
- Don’t open the oven early. Steam is what inflates choux. Opening too soon can cause deflation.
- Bake until truly golden. Pale shells often collapse as they cool because they’re still too wet inside.
- Cool before filling. Warm shells melt whipped cream fast. Patience pays off.
Variations
- Chocolate cream puffs: Add 2 tablespoons cocoa powder to the powdered sugar in the whipped cream, or drizzle finished puffs with melted chocolate.
- Pastry cream filling: Swap whipped cream for vanilla pastry cream (thicker, more classic).
- Strawberries & cream: Fold in finely chopped strawberries, or layer sliced berries inside each puff.
- Citrus vibe: Add 1 teaspoon orange or lemon zest to the filling for a bright twist.
- Mini cream puffs: Pipe smaller mounds and reduce bake time by a few minutes; keep the color golden.
Storage & Reheating
Unfilled cream puff shells keep best at room temperature in a loosely covered container for 1 day, or frozen airtight for up to 2 months. Re-crisp shells in a 300°F (150°C) oven for 5–8 minutes, then cool before filling. Filled cream puffs should be refrigerated and enjoyed within 24 hours for the best texture.
FAQ
Why did my cream puffs collapse after baking?
Usually they weren’t baked long enough to dry out inside, or the oven was opened too early. Make sure the shells are a deep golden color and feel firm, then let them sit in the turned-off oven with the door cracked for 10 minutes to finish drying.
How do I know when choux dough has enough eggs?
Look for a smooth, glossy dough that falls from a spoon in a thick ribbon and makes a “V” shape. If it’s too stiff, it won’t puff well; if it’s too loose, it spreads. Add eggs one at a time and stop when the texture looks right (you may not need the last bit of egg).
Can I make cream puffs without a piping bag?
Yes. Use a small cookie scoop or two spoons to portion the dough into mounds. They’ll be a little more rustic, but still delicious. Smoothing the tops with a damp fingertip helps them bake more evenly.
What’s the easiest beginner-friendly filling?
Sweetened whipped cream is the simplest: heavy cream + powdered sugar + vanilla. For a slightly more stable filling that holds up longer, add 2 tablespoons instant vanilla pudding mix while whipping.
Can I make these ahead for a party?
Absolutely. Bake the shells up to 1 day ahead (or freeze them longer), then re-crisp in the oven and cool completely. Fill right before serving so the shells stay light and crisp instead of soft.