

If your future self could send you a thank-you note, it would probably be for this pot pie freezer meal situation. You do one cozy cook session, stock the freezer with comfort food, and then “homemade dinner” happens on a random Tuesday with basically no effort.
This pot pie recipe is designed specifically for make-ahead: a thick, creamy filling that freezes well, plus a simple crust plan that bakes up golden when you’re ready.
Why You’ll Love This
It’s the ultimate make-once, bake-later meal: hearty, family-friendly, flexible with whatever veggies you’ve got, and it freezes like a champ without turning watery or bland.
Ingredients
- 2 tablespoons unsalted butter
- 1 small yellow onion, diced
- 2 medium carrots, peeled and diced
- 2 celery ribs, diced
- 3 cloves garlic, minced
- 1/3 cup all-purpose flour
- 2 cups chicken broth (low sodium preferred)
- 1 cup whole milk (or half-and-half for extra richness)
- 1 teaspoon kosher salt, plus more to taste
- 1/2 teaspoon black pepper
- 1 teaspoon dried thyme (or 1 tablespoon fresh)
- 1/2 teaspoon dried rosemary (optional but so good)
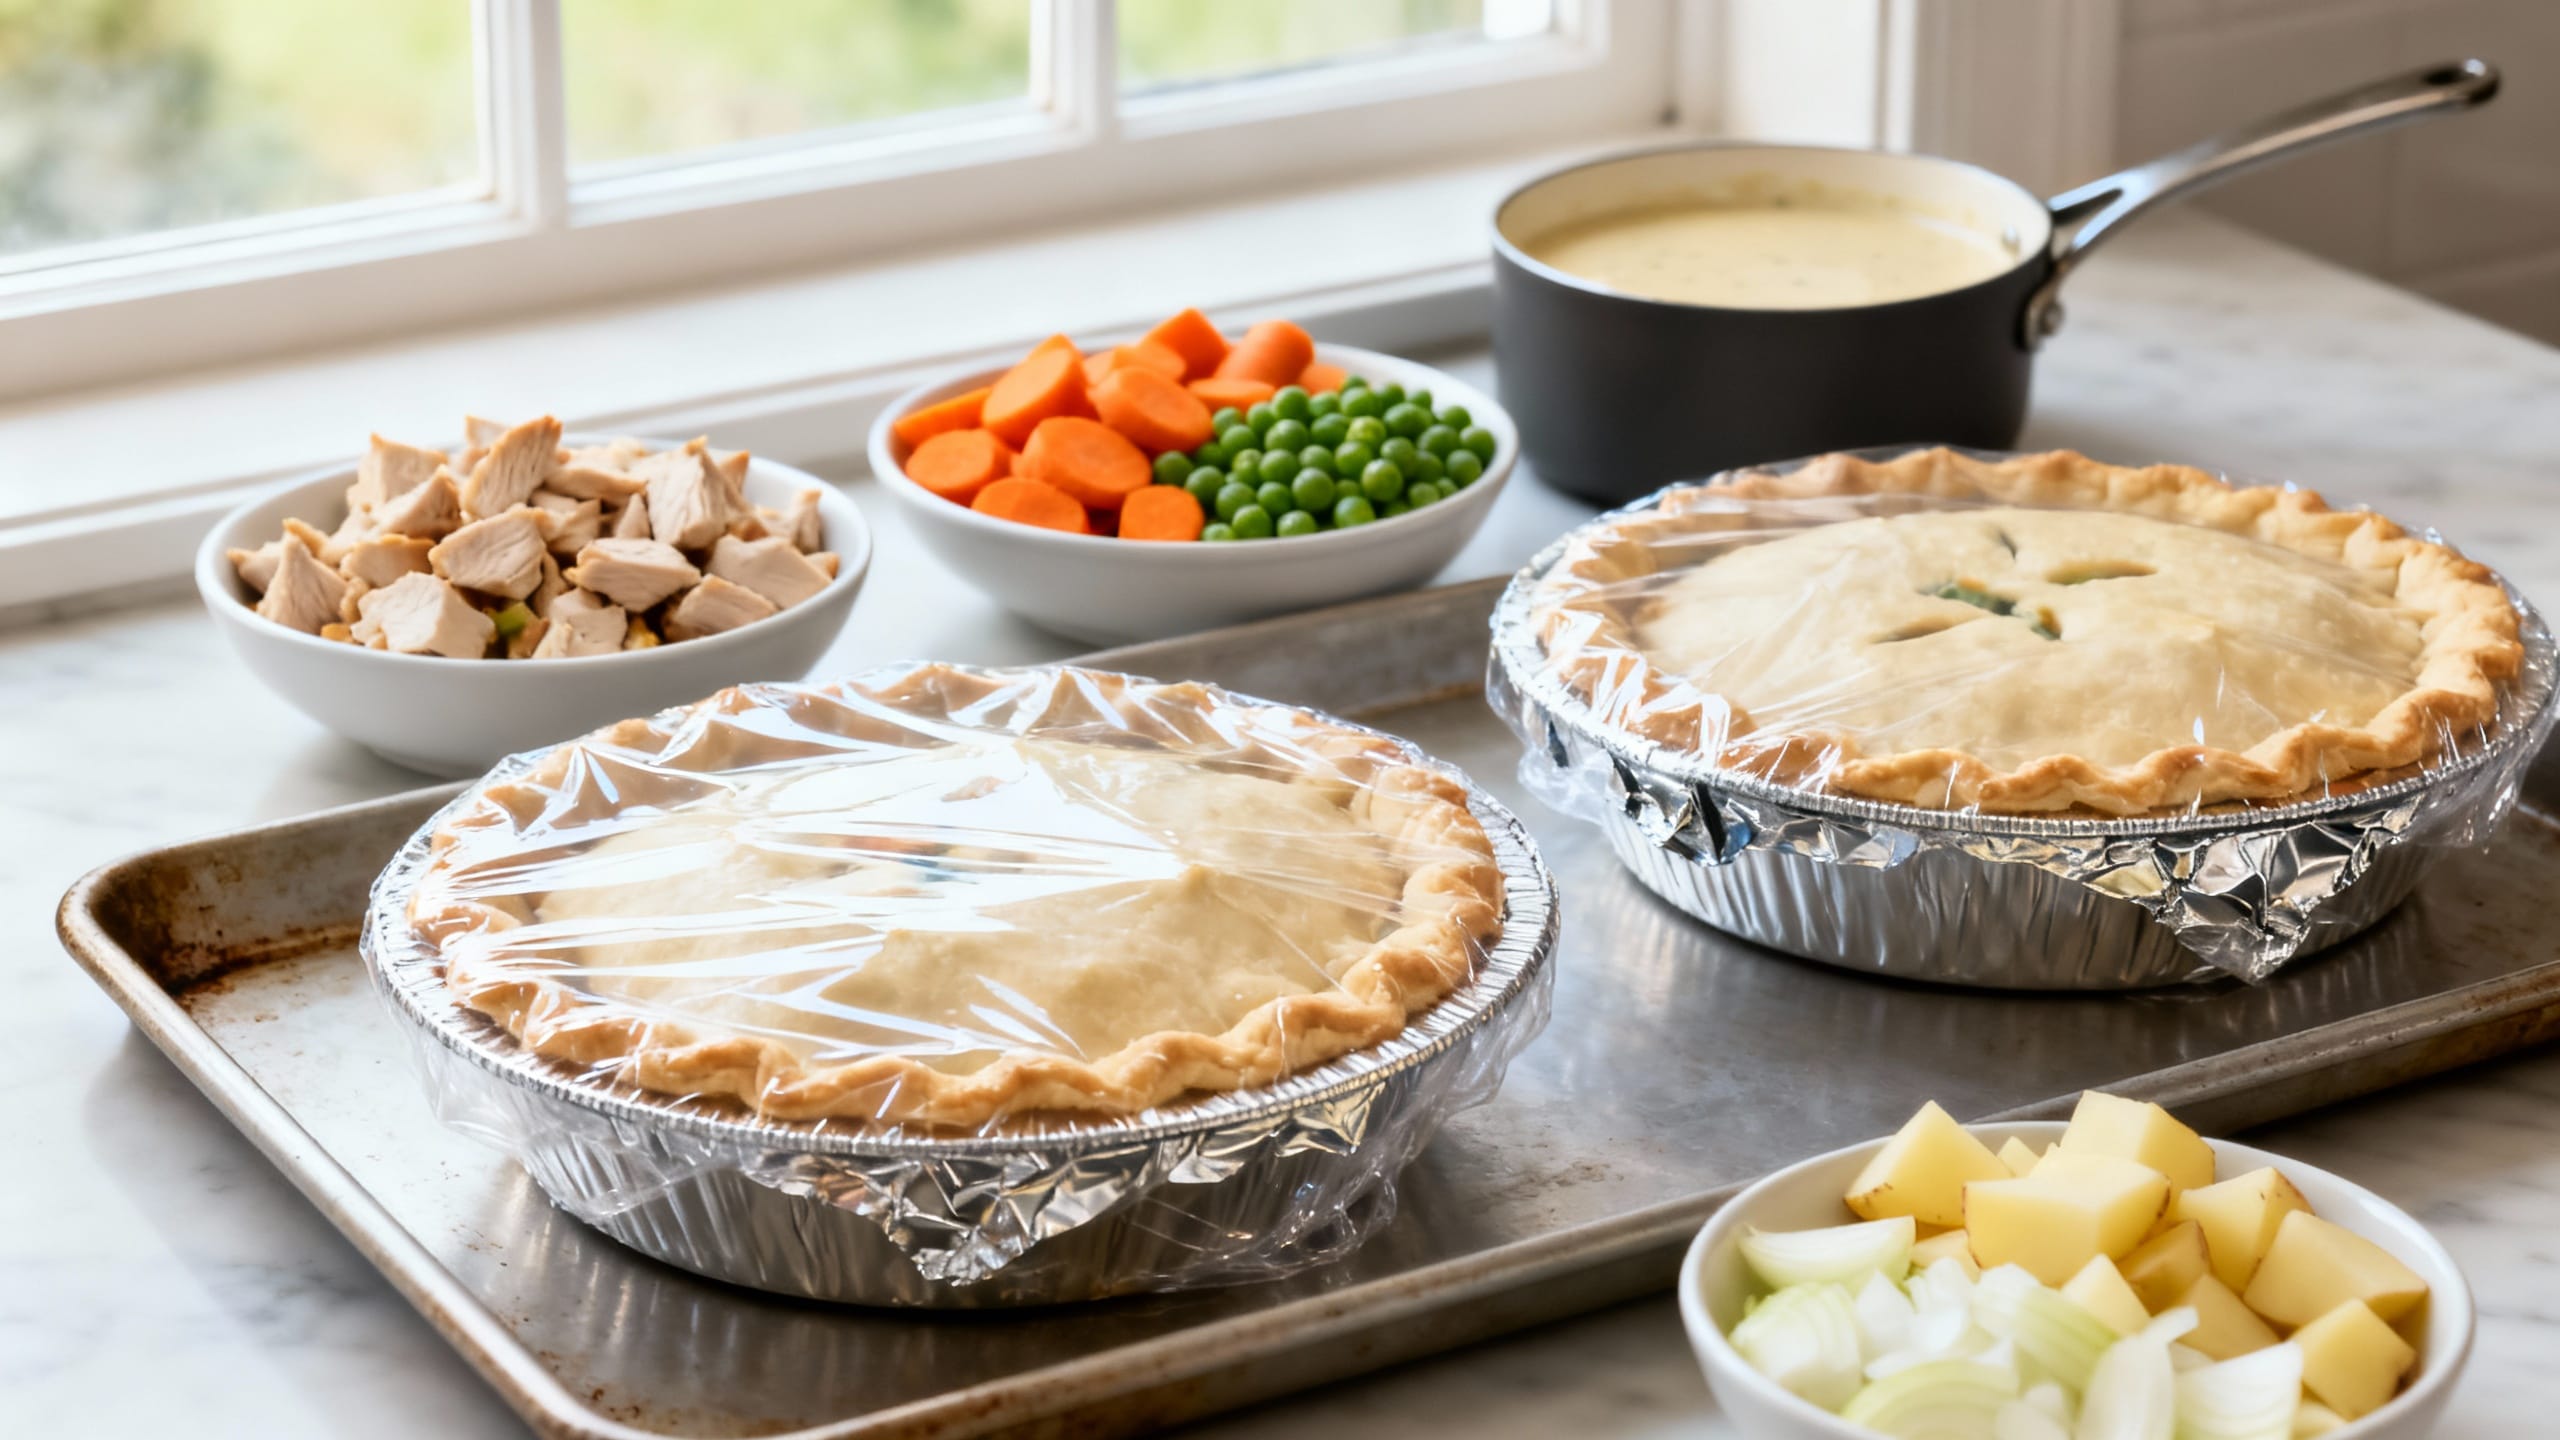
- 2 cups cooked chicken, shredded or diced (rotisserie works great)
- 1 cup frozen peas
- 1/2 cup frozen corn (optional)
- 2 tablespoons chopped fresh parsley (optional)
- 2 refrigerated pie crusts (or 1 double-crust homemade)
- 1 egg, beaten (for egg wash)
How to Make It
- Cook the base veggies. In a large skillet or Dutch oven, melt butter over medium heat. Add onion, carrots, and celery. Cook 6–8 minutes until softened. Add garlic and cook 30 seconds.
- Make the roux. Sprinkle flour over the veggies and stir constantly for 1 minute, coating everything. This cooks out the raw flour taste and sets you up for a thick, freezer-friendly filling.
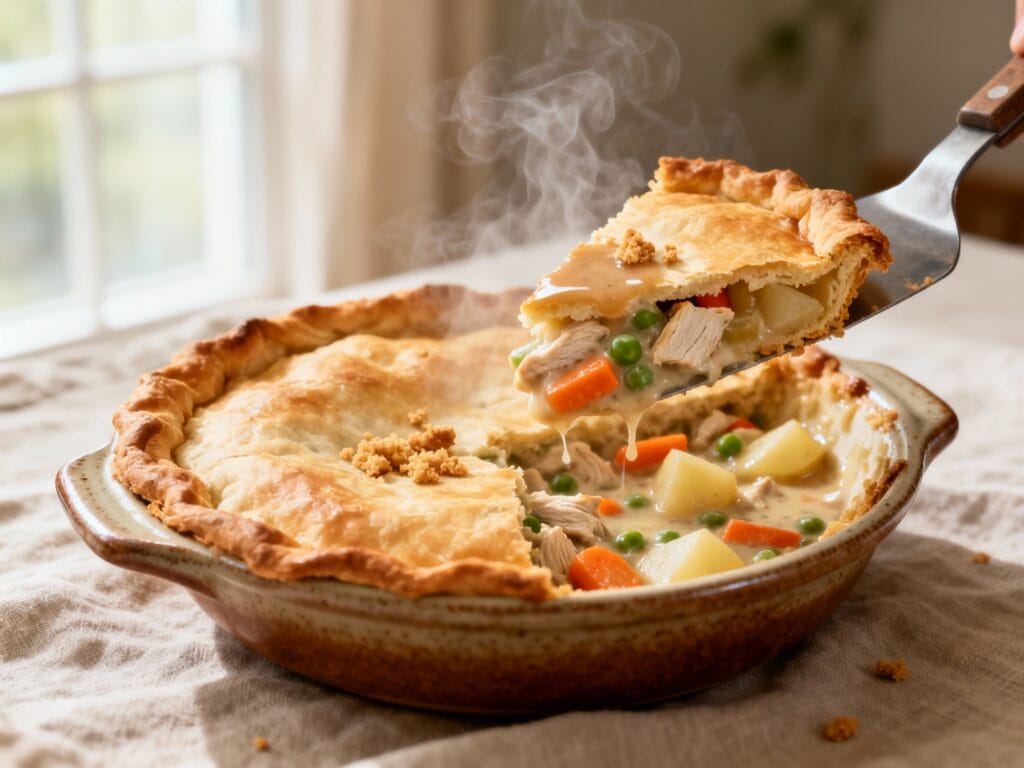
- Build the sauce. Slowly whisk in chicken broth. Once smooth, whisk in milk. Add salt, pepper, thyme, and rosemary. Simmer 3–5 minutes, stirring, until thick like a creamy gravy.
- Add the chicken and veg. Stir in cooked chicken, peas, and corn (if using). Simmer 1–2 minutes, then remove from heat. Taste and adjust seasoning. Let the filling cool 20–30 minutes (important for freezer meals).
- Assemble for baking now or later. Press one pie crust into a 9-inch pie dish (or divide into two 8-inch disposable foil pans for two freezer pies). Spoon in the cooled filling.
- Top and vent. Lay the second crust over the top. Trim excess, crimp edges, and cut 4–5 vents. Brush with egg wash for that bakery-level shine.
- For freezer meals: Place the assembled, unbaked pie on a sheet pan and freeze until solid (about 3–4 hours). Then wrap tightly in plastic wrap plus foil. Label with date and baking instructions.
- For baking now: Bake at 400°F for 35–45 minutes, until deep golden and bubbling. If edges brown too fast, cover the rim with foil.
Tips for the Best Results
- Cool the filling before assembling. Warm filling can melt the crust and make it soggy (especially after freezing).
- Thick is good. If your filling seems thin, simmer a couple extra minutes. A thicker filling holds up better after freezing and reheating.
- Use a metal or foil pan for freezer pies. They freeze and bake more evenly than thick ceramic (and you don’t tie up your favorite dish).
- Freeze uncovered first. Flash-freezing prevents the wrap from sticking to the crust and keeps the top pretty.
- Vent the top crust. Those little slits are non-negotiable—steam needs an exit or the crust can turn gummy.
- Protect the crust edges. A foil ring halfway through baking saves you from burnt edges while the center finishes.
Variations
- Turkey pot pie: Swap in cooked turkey (perfect for holiday leftovers).
- Extra veggie: Add 1 cup diced mushrooms or green beans; sauté mushrooms with the onions for best flavor.
- Cheddar biscuit top: Skip the top crust and bake with biscuit dough or drop biscuits instead (great for bake-now nights, less ideal for long freezing).
- Herby upgrade: Add a squeeze of lemon and extra parsley at the end for a brighter, fresher vibe.
- Mini freezer pies: Assemble in ramekins or jumbo muffin tins with pastry rounds for individual portions—cute and practical.
Storage & Reheating
Freeze unbaked, wrapped pot pie for up to 3 months for best quality. Refrigerate baked leftovers in an airtight container for up to 4 days. Reheat slices in a 350°F oven until hot (about 15–20 minutes) to keep the crust crisp; the microwave works in a pinch, but the crust will soften.
FAQ
Do I freeze pot pie baked or unbaked?
Unbaked is best for freezer meals. You’ll get a fresher-tasting filling and a crispier crust when it bakes later. If you already baked it, it’ll still freeze fine—just expect slightly softer crust on reheat.
How do I bake a frozen pot pie?
For a frozen, unbaked 9-inch pie: bake at 400°F for 25 minutes, then reduce to 350°F and bake 45–60 minutes more, until the center is bubbling and the top is deep golden. If the crust browns too fast, tent with foil.
Can I thaw it first to make baking faster?
Yes. Thaw overnight in the fridge (keep it wrapped). Then bake at 400°F for about 35–45 minutes. Thawing helps it bake more evenly, especially if your pie is very full.
How do I prevent a soggy bottom crust?
Make sure the filling is thick and cooled before assembling, and don’t let an unbaked pie sit in the fridge for days before freezing or baking. If your oven runs cool, place the pie on the lower rack for the first 15–20 minutes to help set the bottom crust.
What’s the best way to label freezer pot pies?
Write the date plus “Bake from frozen: 400°F 25 min, then 350°F 45–60 min” directly on the foil. Also note the filling (“chicken pot pie”) so you’re not playing freezer mystery later.