


Cream Puffs Recipe: How to Get Hollow Centers Every Time (No Soggy Shells)
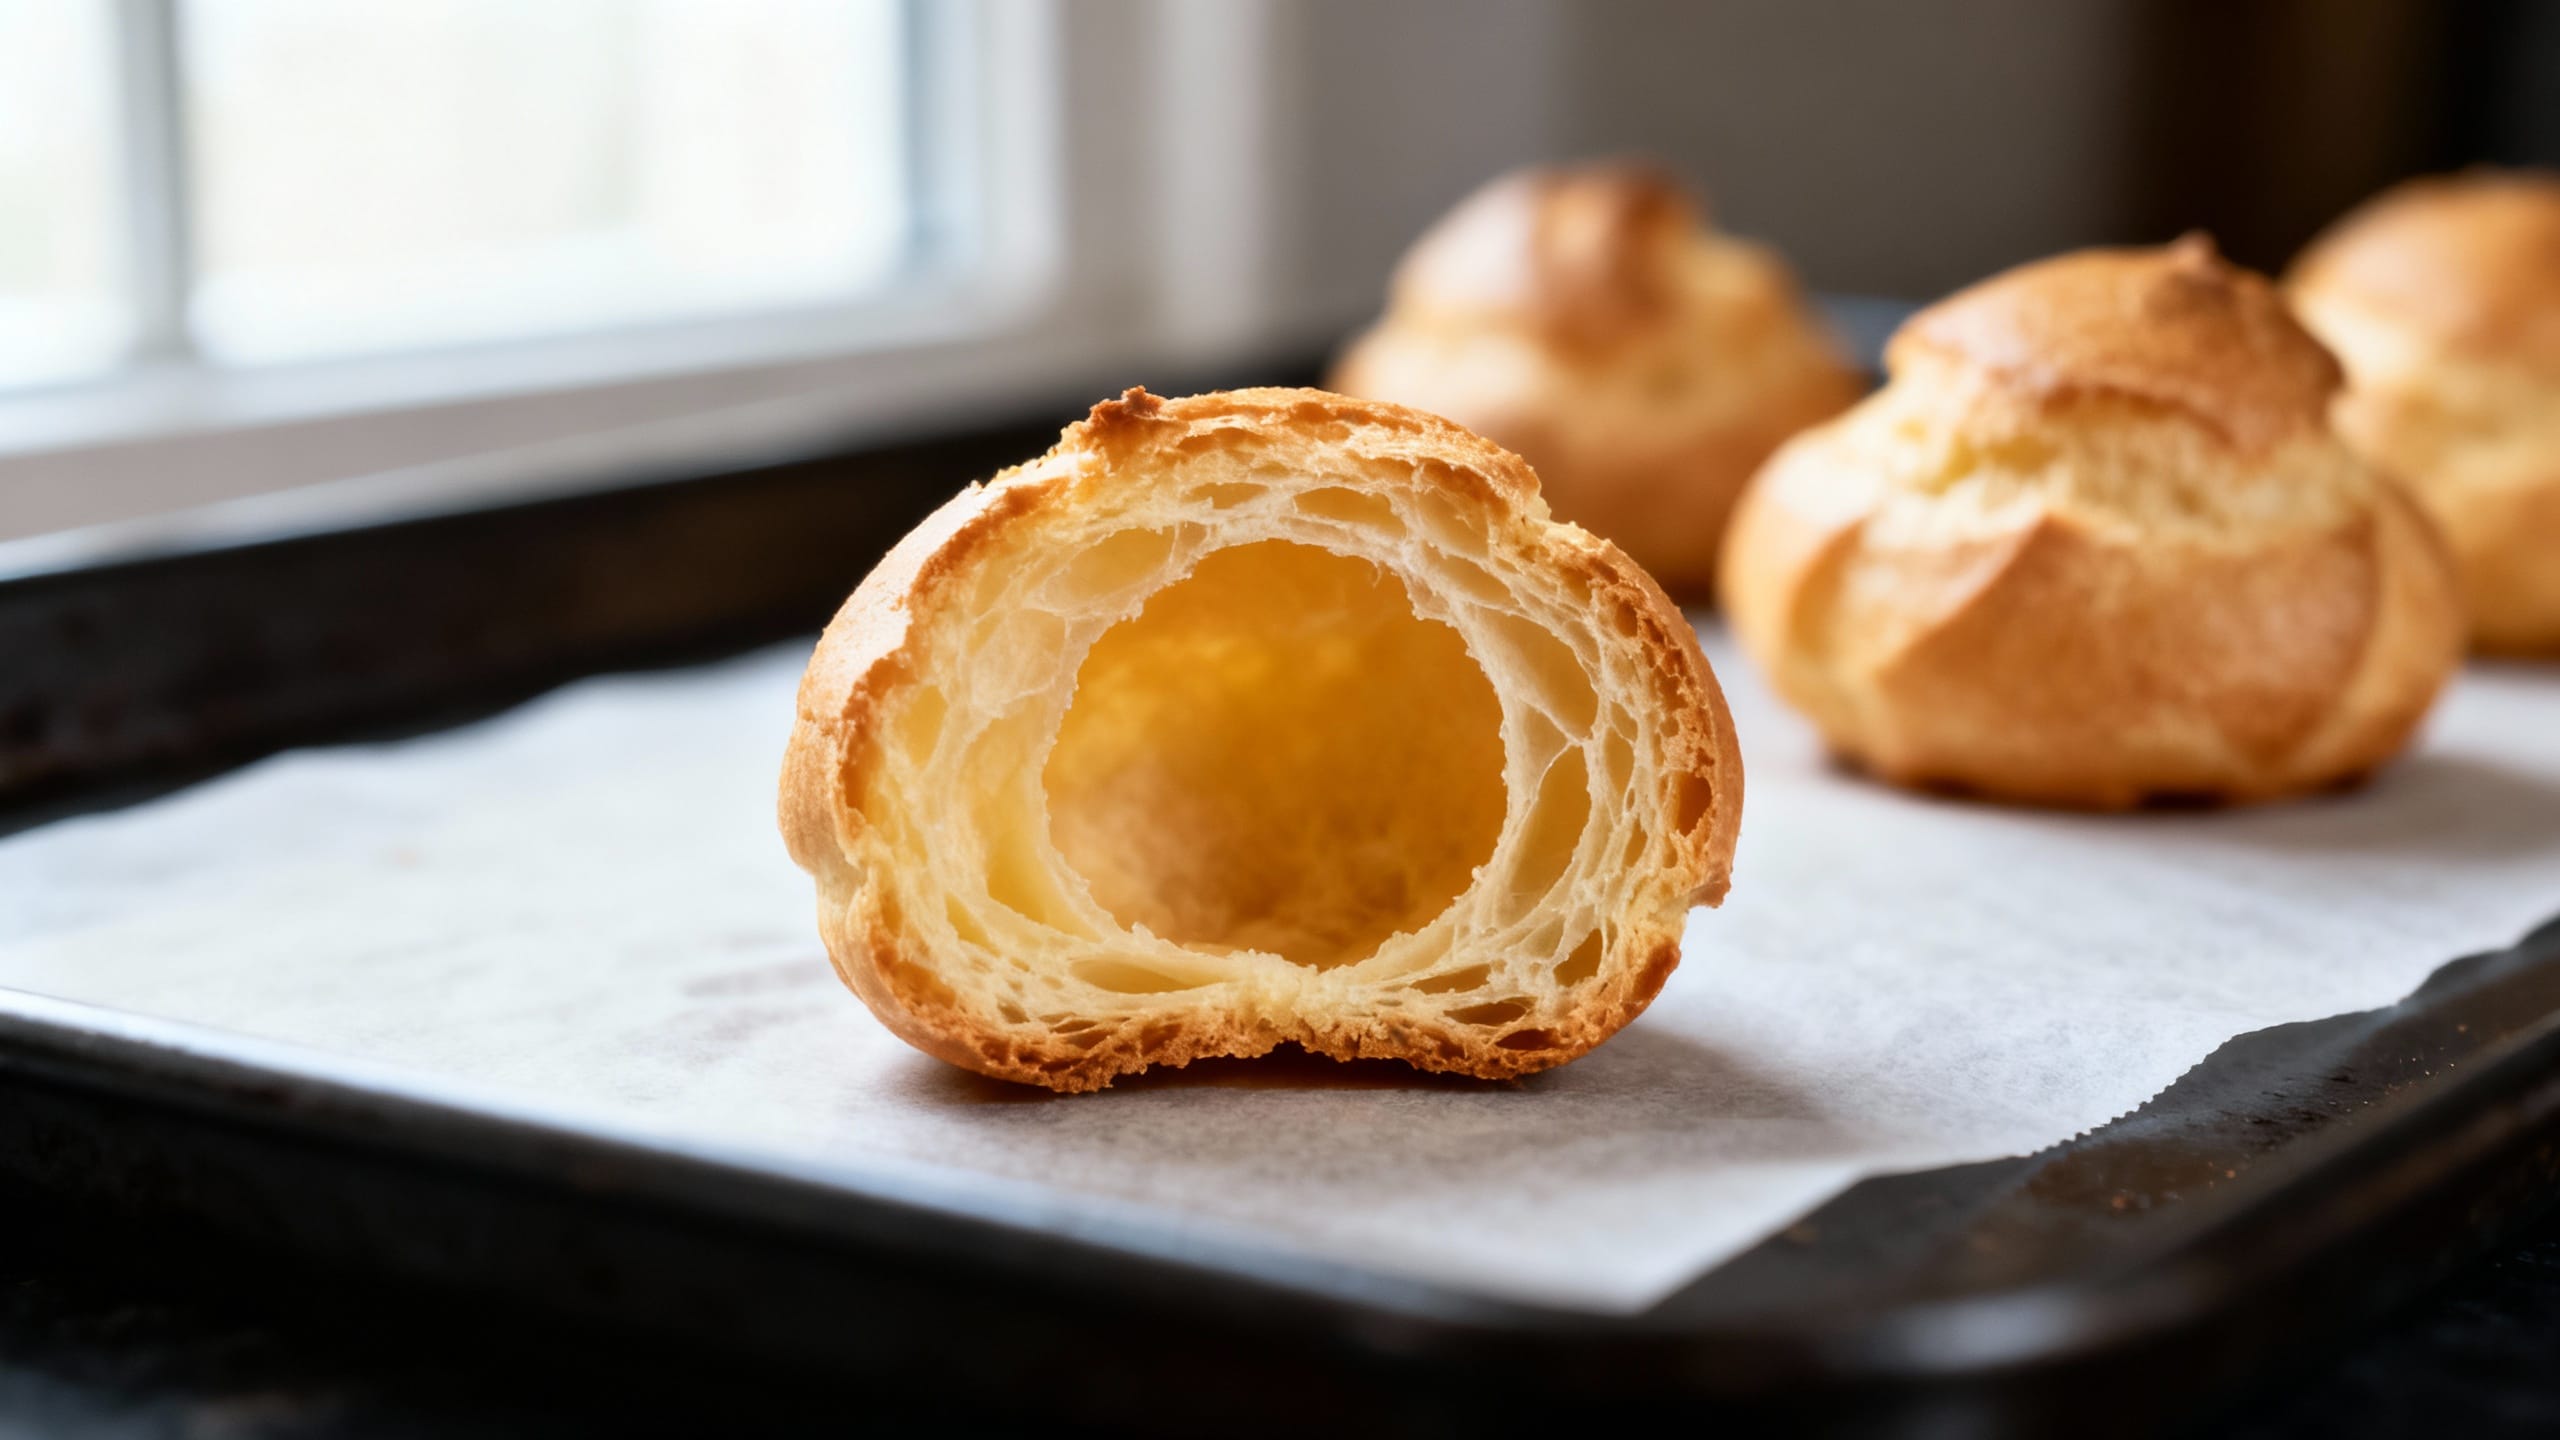
Cream puffs are one of those “looks fancy, actually doable” desserts. When they’re right, you get crisp, golden shells with a big hollow center ready for clouds of whipped cream or pastry cream.
This post is all about the two things everyone wants: hollow centers every time and zero soggy shells. We’re using classic pâte à choux with a few small moves that make a huge difference.
Why You’ll Love This
These cream puffs bake up tall, light, and crisp, with reliable hollow centers (aka maximum filling space) and simple, no-drama steps you can repeat confidently for parties, holidays, or a random Tuesday glow-up.
Ingredients
- 1/2 cup (120 ml) water
- 1/2 cup (120 ml) whole milk
- 8 tbsp (113 g) unsalted butter, cut into pieces
- 1 tbsp granulated sugar
- 1/2 tsp fine salt
- 1 cup (125 g) all-purpose flour
- 4 large eggs, room temperature
- 1 extra egg, lightly beaten (optional, for egg wash)
- 2 cups (480 ml) cold heavy whipping cream
- 3–4 tbsp powdered sugar (to taste)
- 1 tsp vanilla extract
How to Make It
- Preheat the oven to 425°F (220°C). Line a large baking sheet with parchment paper. If you want extra even puffs, lightly mark 2-inch circles on the back of the parchment as a piping guide.
- In a medium saucepan over medium heat, combine water, milk, butter, sugar, and salt. Heat until the butter is fully melted and the mixture just starts to simmer (small bubbles around the edges).
- Reduce heat to low, add the flour all at once, and stir vigorously with a wooden spoon or sturdy spatula until a smooth dough forms. Keep stirring and “cook” the dough for 1–2 minutes. You’re looking for a thin film on the bottom of the pan and the dough pulling away cleanly from the sides.
- Transfer the dough to a mixing bowl (stand mixer with paddle or a regular bowl). Let it cool for about 3–5 minutes so it’s warm but not hot. Add eggs one at a time, mixing well after each. The dough will look separated at first, then turn glossy and smooth. After the 4th egg, check consistency: it should slowly fall from the spatula in a thick “V” shape. If it’s too stiff, beat in a little of the extra beaten egg a teaspoon at a time.
- Pipe or scoop 12–16 mounds onto the prepared baking sheet, about 2 inches wide and spaced apart. Smooth any pointy tops with a damp fingertip (pointy tips can burn). If using egg wash, lightly brush just the tops.
- Bake at 425°F (220°C) for 10 minutes, then (without opening the oven) reduce to 375°F (190°C) and bake 18–22 minutes more, until deeply golden and firm. Do not open the door early—steam is what lifts them.
- Dry them out (this is the anti-soggy step): Turn the oven off, crack the door open, and let the shells sit inside for 10 minutes. Then remove and poke a small hole in the side or bottom of each puff to release steam. Cool completely on a rack.
- Make the filling: Whip cold heavy cream with powdered sugar and vanilla to medium-stiff peaks (holds its shape but still looks silky). Don’t overwhip into butter territory.
- Fill and finish: Slice puffs in half or pipe filling through the steam hole using a piping bag. Dust with powdered sugar right before serving for the classic bakery look.
Tips for the Best Results
- Cook the dough on the stove: That 1–2 minute “drying” step helps prevent wet interiors and improves rise.
- Use room-temp eggs: They blend in faster and more evenly for a smooth, pipeable dough.
- Chase the “V” test: The dough should fall from a spatula in a thick V. Too stiff = not enough lift; too loose = spreads flat.
- Don’t open the oven early: Opening the door can collapse your puffs before the structure sets.
- Go for deep golden: Pale shells are usually underbaked and more likely to turn soft or collapse.
- Dry in the oven: The crack-the-door step plus venting holes is the best defense against soggy shells.
- Pipe consistently: Even size = even bake. A 1/2-inch round tip is perfect, but a zip-top bag with the corner snipped works too.
Variations
- Pastry cream filling: Swap whipped cream for vanilla pastry cream (or diplomat cream for the best of both worlds).
- Chocolate drizzle: Melt chocolate with a splash of cream and drizzle over the tops.
- Mocha cream: Add 1–2 tsp instant espresso powder (dissolved in 1 tsp hot water) to the whipped cream.
- Strawberries & cream: Fold finely diced strawberries into the whipped cream right before filling.
- Craquelin topping: Add thin frozen disks of butter-sugar dough on top before baking for super crisp, bakery-style puffs.
Storage & Reheating
Unfilled shells keep at room temperature (loosely covered) for 1 day or frozen for up to 2 months. To re-crisp, bake at 300°F (150°C) for 5–8 minutes, then cool before filling. Filled cream puffs are best the day they’re made; store them in the fridge and plan to eat within 24 hours for the best texture.
FAQ
Why didn’t my cream puffs get hollow centers?
Usually it’s one of three things: the dough was too wet (too much egg), the oven wasn’t hot enough at the start, or the puffs were underbaked. The initial high heat creates steam that inflates the shells; baking long enough (until deep golden) sets the structure so the center stays hollow.
How do I keep cream puff shells from getting soggy?
Dry them out after baking: turn the oven off, crack the door for 10 minutes, then poke a small hole to vent steam. Also, don’t fill them until close to serving. Moist fillings + time = softness.
Can I make the pâte à choux dough ahead of time?
It’s best baked right after mixing, but you can pipe the mounds onto a tray and refrigerate them for up to a few hours. Bake straight from the fridge, adding a couple extra minutes if needed. For longer prep, freeze piped mounds and bake from frozen.
What’s the best way to fill cream puffs without slicing them?
Poke a hole in the bottom (or use the steam vent hole) and pipe filling in with a pastry bag fitted with a small round tip. Stop when you feel resistance or see the shell slightly expand—overfilling can crack the puff.
My cream puffs collapsed after baking—what happened?
Collapsing is almost always underbaking or opening the oven door too soon. Make sure they’re a rich golden brown and feel light but firm. The oven-drying step helps a lot too, because it reduces leftover interior moisture that can soften the structure.