

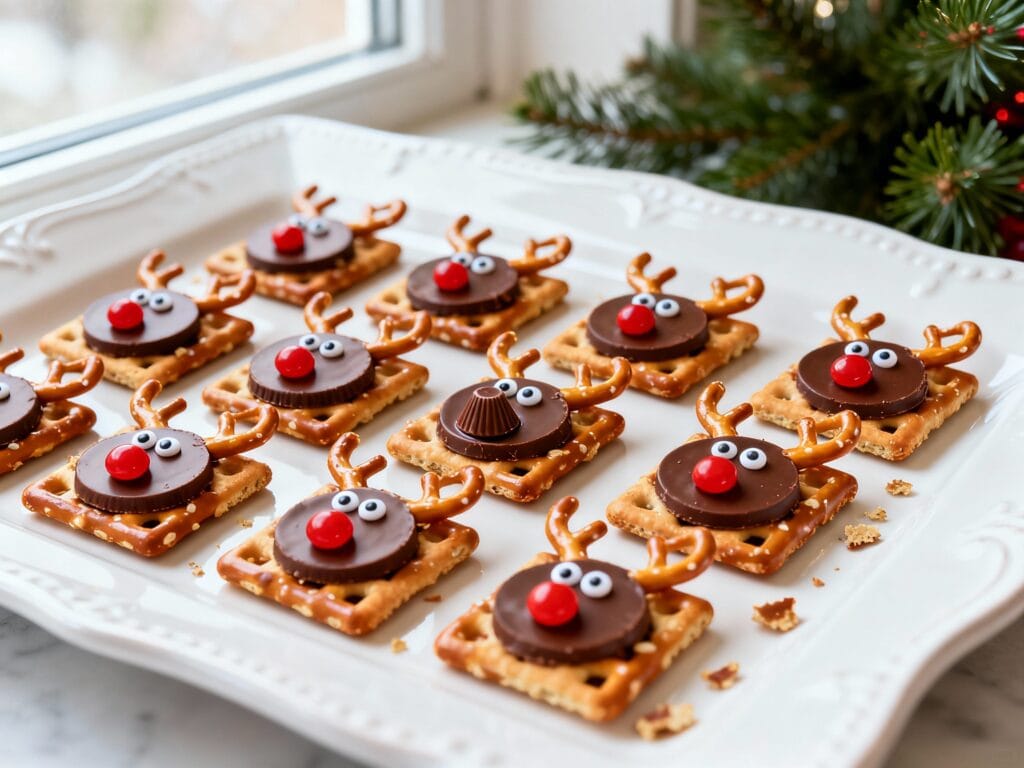
Reindeer Pretzel Treats That Don’t Melt: The No-Fail Assembly + Storage Guide
These reindeer pretzel treats are the cutest little holiday snack—and the biggest complaint is usually the same: “Why did mine melt into a mess?” This version is built to stay crisp, hold their shape, and store beautifully. Follow the assembly order (it matters) and you’ll get picture-perfect reindeer every time.
Why These Reindeer Pretzel Treats Don’t Melt
The secret is using a quick “just-soften” step instead of fully melting the candy, plus a short chill to lock everything in. If you overheat the chocolate, it stays too fluid and keeps sliding even after it looks set. Here, we warm the base just enough to anchor the candies, then cool them before storing.
Recipe
- Prep time: 15 minutes
- Cook time: 2 minutes
- Total time: 25 minutes
- Servings: about 24 reindeer
Ingredients
- 24 small pretzel twists (or waffle pretzels)
- 24 chocolate candy melts or chocolate Rolo-style candies (see notes below)
- 48 candy eyes
- 24 red candy-coated chocolates (like red M&M’s) or mini red hearts for noses
- 24 brown mini M&M’s (optional, for extra detail)
- 1–2 teaspoons melted chocolate or frosting (only if needed as “glue”)
Step-by-Step Instructions
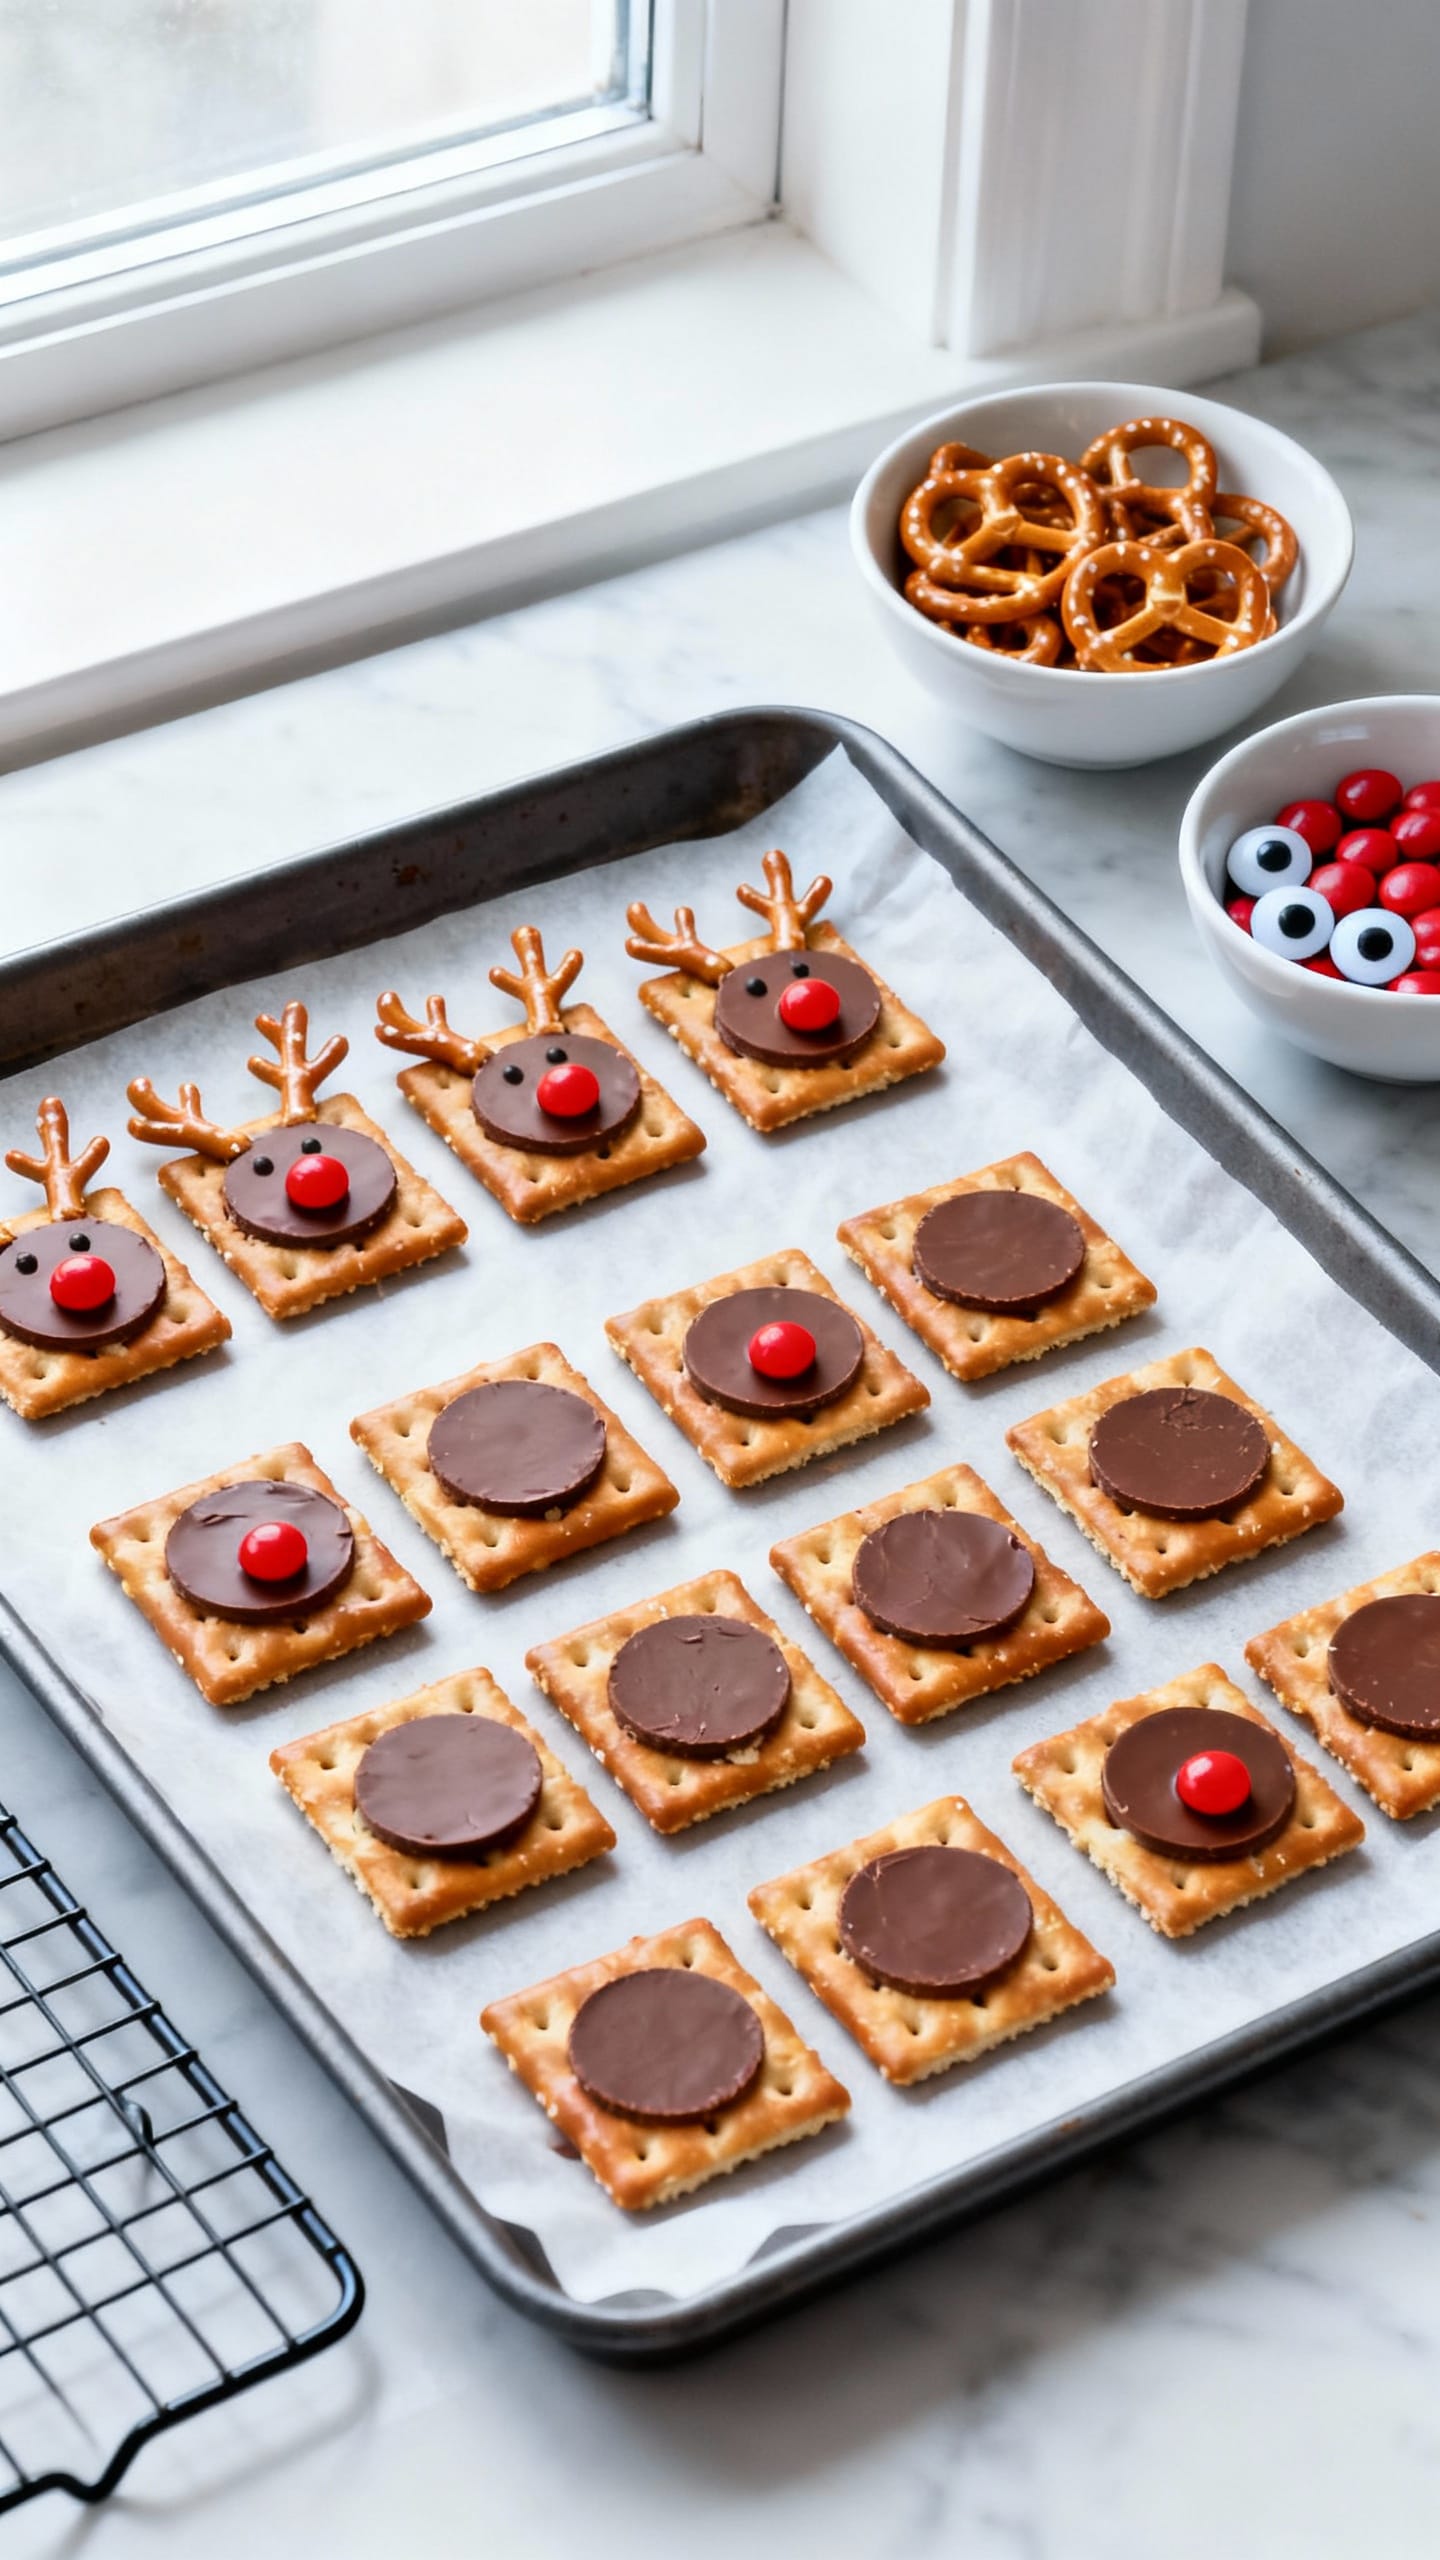
- Prep your tray: Line a baking sheet with parchment paper. Make sure it fits in your fridge or freezer.
- Set up an assembly station: Open candy eyes and separate the red noses. Having everything ready is what keeps the chocolate from warming up while you hunt for decorations.
- Arrange pretzels: Place pretzel twists on the lined tray. Leave a little space between each so you can decorate quickly.
- Add the chocolate base: Place one candy melt (or one unwrapped chocolate candy) on top of each pretzel. Center it so it sits flat.
- Warm briefly: Put the tray in a 250°F oven for 2 minutes, just until the chocolate looks slightly glossy and soft (not puddled). Ovens vary, so start checking at 90 seconds.
- Build the reindeer face: Working one at a time, press 2 candy eyes into the softened chocolate. Add 1 red candy as the nose. Press gently—just enough to adhere.
- Chill to set: Transfer the tray to the fridge for 10–15 minutes until firm.
- Finish and store: Once fully set, move reindeer to an airtight container with parchment between layers.
No-Fail Assembly Tips (So They Stay Put)
- Use low heat and short time: The goal is “soft,” not melted. If the chocolate starts to slump or spread, it was heated too long.
- Decorate immediately: Candy eyes and noses should go on while the chocolate is still tacky, within a minute or two of coming out of the oven.
- Press straight down: Sliding decorations across the surface smears chocolate and makes details drift.
- Chill before stacking: Even if they look set, give them the full chill time so they don’t smudge in the container.
- Keep hands cool and dry: Warm fingers can soften the chocolate. If your kitchen is warm, assemble in small batches.
Swaps & Variations
- Chocolate options: Candy melts are the most stable. Chocolate caramels (like Rolos) taste amazing but soften faster in warm rooms.
- Pretzel shapes: Twists look like antlers built-in. Waffle pretzels create a bigger “face” and are extra sturdy for parties.
- Nose ideas: Red mini M&M’s are classic. Red jelly beans work, but they’re heavier—press them in firmly.
- Allergy-friendly: Use dairy-free chocolate-style melts and check pretzel/candy labels. You can also skip candy eyes and pipe dots of melted chocolate instead.
Storage Guide (Room Temp vs Fridge) + How to Prevent Melting
Best storage: Store in an airtight container with parchment between layers. Keep them in a cool, dry spot away from sunlight and any heat source (like the top of the fridge or near a stove).
- Room temperature: Great for 2–3 days if your home stays cool (around 68–72°F). Choose candy melts if you plan to keep them out.
- Refrigerator: Best for 5–7 days. Let the container sit closed at room temp for 10 minutes before opening to reduce condensation on the chocolate.
- Freezer: Freeze up to 1 month in a freezer-safe container. Thaw overnight in the fridge, then rest at room temp (still closed) for 10–15 minutes before serving.
No reheating needed: If you accidentally warmed them (like in a hot car), pop them in the fridge for 10 minutes to re-firm. If decorations slid, you can “patch” with a dot of melted chocolate as glue.
Serving Ideas
- Scatter on a cookie tray alongside sugar cookies and peppermint bark for an easy holiday platter.
- Top hot cocoa boards—these are adorable next to marshmallows and candy canes (serve them on the cool side of the display).
- Bag 4–6 in a cellophane treat bag with a ribbon for classroom parties or neighbors.
- Use as cupcake toppers: set one reindeer on frosting right before serving.
FAQ
1) Why did my reindeer pretzel treats melt and spread?
They were heated too long or at too high a temperature. Warm only until the chocolate looks slightly shiny and soft, then decorate right away and chill to set.
2) Are candy melts better than chocolate kisses or Rolos for no-melt treats?
Yes—candy melts are the most stable for warm rooms. Rolos and some chocolates soften faster, so they’re best if you can chill and serve soon.
3) How far in advance can I make reindeer pretzel treats?
You can make them 2–3 days ahead at cool room temp, 5–7 days ahead if refrigerated, or up to 1 month ahead if frozen.
4) How do I keep them from getting sticky or wet in the fridge?
Prevent condensation by letting the closed container sit at room temperature for about 10 minutes before opening. Moisture on cold chocolate is what causes stickiness.
5) What’s the easiest way to fix decorations that slid off?
Chill the treats until firm, then use a tiny dot of melted chocolate (or thick frosting) as glue to reattach eyes or noses, and chill again to set.